Sunday, August 25, 2013

The Search for Solo— An X-wing Report

Episode V and a .V

The Search for Solo

Following the disaster at Bespin, Lando Calrissian and Chewbacca are searching for Han Solo and his captor, the bounty hunter Boba Fett. Rebel intelligence report no word of either Fett or Solo on Tatooine, the obvious destination— but then, where are they?

Bribing his underworld connections, Lando learns that Fett's ship has been sighted near the Anootla asteroid cluster.

The Alliance Command issue order— disable the Slave 1 and scan her for Captain Solo's presence— or at least clues to his whereabouts.

Within hours, Lando and a small fleet jump for Anootla... but are they headed to a rescue, or something else?

Back to a Galaxy Far, Far Away

(or at least a thirty-minute drive at rush hour).

Once again my gaming buddies and I converged for an evening of X-Wing, which appears to have become our current obsession. (We do play other games— honest!) On the evening in question, our location of choice was Will's domicile— Commodore Will, for the purposes of this evening's game (and the starting college football season— Go Vandy!).

The story— an original scenario featuring the Firespray-31 "patrol and attack craft," better known as Slave 1, Boba Fett's personal ship from Episode V The Empire Strikes Back.

Although I don't own this ship myself (yet), Will had brought it to one of our earlier games, and I thought it would be good to try it out in a balanced scenario, with a theme appropriate to the devious, self-serving bounty hunter.
The Forces of Good and Better Than Good, holding their secret orders.
Rebels, L t R: Lieutenant Chase, Commodore Will, Commander Jim
Empire, L t R: Darth Alexander, Darth Michael (as Colonel Soontir Fel)

I decided to go all out with this one, giving each side "mission dossiers"with their goals and battle intelligence. And yes, this meant that both sides weren't fully informed as to the other's objectives or capabilities. I knew, of course, which is why I operated the Slave 1. Its role wasn't particularly secret to either side, so I could play without having any unfair advantage. Command of the Empire forces was thus left to Darth Michael, with my son Darth Alexander fulfilling the role of eager young officer... who got his command thoroughly shot up over the course of the evening. (So he fulfilled his role well.)

The Battle Begins

The Rebels arrive...
... and the forces advance.
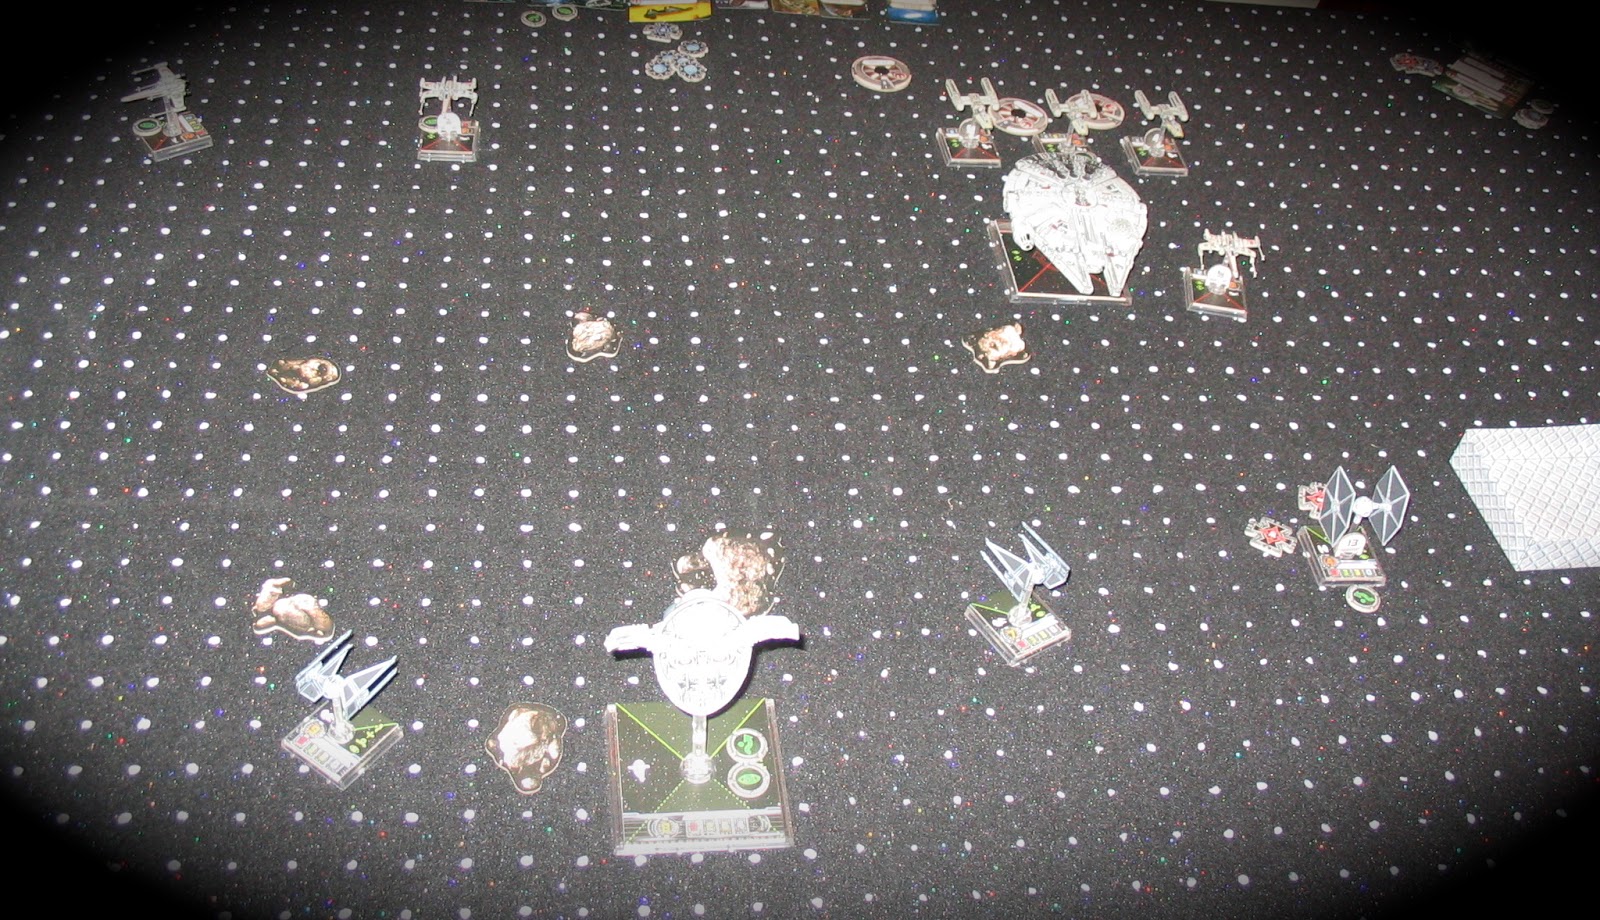
The scene opens on the Anootla system, near a prominent asteroid cluster, as the Rebel forces approach Slave 1 and her suspiciously small escort. Yes, they had two of the fast and dangerous TIE Interceptors, but the Rebel commanders were not blind to the apparent weakness of the foe.

Starting forces:

Rebel Alliance:
Millenium Falcon, piloted by Lando Calrissian (Commodore Will).
 3 X-wings: Luke Skywalker, a Red Squadron pilot, and a rookie (Lieutenant Chase, rebellious son of Darth Michael)
3 Y-wings with ion cannon turrets: "Dutch" Vander and two Gold Squadron veterans (Commander Jim)

Empire:
TIE Interceptor: Soontir Fel (Darth Michael)
TIE Interceptor: Turr Fennir (Darth Alexander)
TIE fighter: Black Squadron (Darth Alexander)
Slave 1, piloted by Boba Fett (yours truly)

Yeah, you can do the math, too, right?

First Moves to First Blood

Darth Alexander loses his first wingman on the first turn!
Things got off with a bang— specifically, the silent "bang" created when a TIE fighter turns into so much cosmic vapor. The first TIE got fragged without firing a shot! The Rebels were celebrating an early sighting of victory as they reached the asteroid field...

Guess What...


Okay, yeah, everybody saw this coming. But it was still fun.

The Rebel commanders observe the tactical situation with dismay:
"Where'd all those TIE fighters come from?"
"I told you it was a trap."

Revised Empire Forces:

2 TIE Interceptors: Soontir Fel, Fel's Wrath
3 TIE Fighters: Howlgunner, Night Beast, Black Squadron Pilot (all Darth Michael)
1 TIE Interceptor: Turr Fennir
3 TIE Fighters (+1 already destroyed): Backstabber, Mauler Mithel, Dark Curse (all Darth Alexander)
Slave 1 (still me)

[Note on both sides, upgrades, secondary weapons, etc., were all fully utilized; the total points were close to 260 for each side.]

The terms of the scenario allowed the Empire to announce the added forces after the plotting phase, any time before the Rebels entered or passed the asteroid field; this turned out to be Turn 2. This allowed the new TIEs to be placed and plot their movements.

Demolition Derby

A Big Hairy Furball... and Lando just had the Falcon waxed.
The sudden arrival of new ships messed with everyone's plotting— almost every ship found itself colliding with either another ship or an asteroid or both. (Slave 1 passed through the field and the furball unscathed, thanks to someone's amazing piloting skills. *Ahem.*)
Boom...
...Boom...
...Boom... and the Y-wings close in.

Despite the confusion, most fighters had a targets, and the close range blasting took out shields and ships left and right. Darth Alexander's forces took the brunt of the attacks; by Turn 4, he was down to two ships, with all but one of his damaged, while Darth Michael was largely unscathed. Yours Truly lost a few shields, as did the Rebels, but they looked to be sitting pretty, and set off in pursuit of Slave 1, with ion cannons primed for action. Seeking to throw the Ys offtrack, I deployed a proximity mine. It didn't work (well, not as intended), but we did manage to blast a Y-wing off my tail— the first Empire kill of the night!

Commander Jim does not look happy. I can't imagine Y...
But they got some payback immediately.
Hey, he's gonna shoot you, too...


... another TIE bites the dust.
The bright spot for the Empire forces came with the destruction of Luke Skywalker, after a brutal team-up by Darth Michael's and Darth Alexander's commands.
No, lieutenant. There is nothing that will save you now.

But the Empire was still taking losses, and the remaining Y-wings were catching up to Slave 1.
And another one's gone...

Yours, Mine and Ours

Commander Jim proved to be too skilled a pilot for my deadly traffic cone... unfortunately, Darth Michael did not— my very own ally flew into the mine, barely surviving with a hit and a critical hit!
Darth Michael makes a wrong turn... "click— BOOM!"
Our trap seemed to be falling apart, and we were turning into our own worst enemies...

Turning the Tables


Boba Fett fights back... scratch another Y-wing!
I'd been doing "scoot and shoot" maneuvers with the Slave 1, relying largely on the aft firing arc for potshots at the Y-wings and the Falcon. But I needed heavier efforts, especially as I now bore four target locks on me and my shields were gone. I flipped the ship to bring my hunters into my foreword arc for use of my powerful secondary weapons— a heavy laser cannon and an assault missile. It was a good thing I did so, as Jim hit me with two ion blasts in succession, leaving me unable to maneuver for a turn. But my heavy weapons were now aimed at the hounds, and the hunters became the hunted. The remaining TIEs closed in as well. The Falcon drew fire to protect the crucial Y-wings, but all were now in trouble, and the Falcon, out of shields, was taking hull hits. My blasts took out a second Y-wing, which all but assured victory for the Empire.

Y Becomes the Final Letter in the Alphabet

The final shot came down to Darth Michael. At this point, all but three of the TIEs had been destroyed, and the remainder were not likely to survive much longer. But on Turn 7, Michael lined up a long range shot on the sole remaining Y-wing... and blew her out of the asteroid cluster.
Y did we shoot you? Because we could!

Now unable to fulfill their mission objectives (get four ion counters on the Slave 1 in one turn), the Rebels abandoned the field. Lando would have to travel to Tatooine to find his frozen friend...

Well, That's a Wrap.

All in all, the evening was a success. We had a great time, and the scenario made for a fun mix of vessels and tactical options. It's hard to say after one play whether all the objectives worked. Jim had concerns that the Rebel task— score 6 ion hits on the Slave 1 in a single turn— was too unlikely with only three Y-wings. He's probably right, but as the Ys took a long time to catch up to the Slave 1, and took hits along the way, they never managed to get into a coordinated range for an attempt. In retrospect, I think reducing the goal makes sense, as well as allowing at least one of the hits to be a "carryover" from a previous combat round (per the large ship rules regarding ion hits). I also think a fourth Y in place of an X-wing is a good call as well.

The "It's a Trap" moment was a hit. Jim confirmed they suspected reinforcements would arrive... but not in the middle of the asteroid field, which caught them by surprise. I think they had also planned their entry around an attempt to eliminate the escort and then pursue the Slave 1. In retrospect, the Ys probably should have started from the center of their battlefield edge, not their left, and gone for the Slave 1 from the start.

The Empire objective worked well, and given the losses they took remained in doubt till the end of the game.

As Boba Fett, I found myself questioning my presence on the battlefield. As bait, it became clear to me that Fett needed other motivation to hang around besides just luring Y-wings into a death trap. Yeah, group effort, take one for the team, blah, blah blah— he's a self-serving bounty hunter, not a professional decoy! So I may tweak that a bit, especially as I like the idea of a three-way objective split. (Heh, heh, heh.)

And I'm going to eat my words regarding the Firespray-31 spaceship. I had said I wasn't interested, as I never really cared for the design (like somebody stuck a Viper onto a computer mouse and stood it on its nose...), and also because the Slave 1 never engaged in combat in the original films. (We shall not speak of the "prequels," which Do Not Exist in my Star Wars universe). But FFG have turned the Firespray into a must-have vessel, with unique tactical elements and abilities. I like the fore/aft firing arcs, and the ability to drop mines and bombs. It was a lot of fun to "fly" the Firespray and plot my targeting arcs. And when my own ally flew into the mine... getting to razz Michael about his piloting skills— well, that's just gaming gold! (Seriously, he had to maneuver into the mine to hit it; if he had just flown straight or turned left, he would have been safe. Yet another product of the Imperial Fighter Pilot Academy... "Blow up all you want; we'll clone more.")

Coming Soon: Wave 3 Ships (I've got my pre-order in)

Yes, I'm expecting a B-wing, a TIE Bomber, a Lambda Shuttle, and the Moldy Crow (it's from a Star Wars video game)— probably next week. You can bet I'll be testing them out and posting here.

Till then, cue the Imperial Death March and celebrate the victory over the Rebel scum!

Thursday, July 25, 2013

The Empire (Tries to) Strike Back!

As you may recall, the last foray into space for the gaming group ended with a horribly lopsided victory of the Rebels over the Empire. So when we gathered for a return event, things were definitely going to be different...

The Combatants (L to R):
Commander Will—Rebel
Darth Ben (No, Not *That* Ben)—Empire
Darth Jim—Empire
Darth Alexander (Hiding in the Shadows)—Empire
Commander Not Appearing In This Photo (AKA Yours Truly)—Rebel


And Now Begins...


EPISODE XXL
THE EMPEROR'S NEW UNDERPANTS


In the aftermath of glaring defeat, gasps were heard throughout the corridors of the Imperial military. These were followed by loud thumps as various admirals and generals involuntarily acknowledged their errors and accepted their permanent removal from their positions without protest. Once the bodies were cleared, the Empire’s new top military leaders pledged to serve Emperor Palpatine with renewed vigor and diligence...

The first step was a complete review of the Imperial Navy Manual of Starfighter Doctrine   (e.g. the Star Wars X-wing Miniatures Game Rule Book), to see whether all official guidelines and procedures had been properly adhered to. The new leaders found that while procedures had mostly followed expected protocol, proper attention had not been paid to force makeup and battlefield effectiveness and equivalency. An exhaustive study revealed that Imperial projections as to levels of training and armament required to adequately combat Rebel capabilities had been woefully underestimated. (In short, we had the point matchup totally out of whack.)

In an effort to correct this error, the Imperial high command began planning the next mission with strict attention to both mission objectives and adequate combat capabilities. 

Emperor Palpatine himself had great interest in the battle that would ensue, as it involved the carefully guarded delivery of several autonomous unmanned cargo containers, each carrying materials of a highly sensitive nature for the Emperor’s administrative purposes. [The Imperial Office of Truth and Selective Openness completely denies allegations that the contents were in any way pink or frilly and certainly not feminine at all. And yes, the Emperor wears a size 18... wait, strike that. Execute that reporter! Now!  (SKEPEWWW! SKEPEWWW! Sizzle....)]

Ahem, as we were saying, it was imperative that these important and essential materials not fall into Rebel hands. The Rebels, of course, sent their top men to intercept the cargo, promising a full exposé of the contents in The Galactic Enquirer (“Enquiring Minds Do Want to See This Paper”).

The orders were issued, the site was chosen, and the various commanders were directed to assemble... and in the cold, hard depths of space, battle commenced.

The Nitty Gritty


After the last debacle, I decided to go strictly by the book. Selecting the “Thieves In the Night” scenario included in the Millennium Falcon Expansion Set, I put together an equal points balance collection of some of the Rebel’s best versus the Empire’s best.
The scenario itself calls for the Empire to shepherd three automated cargo canisters from one end of the battlespace to the other. The canisters move independently, always straight and in the same direction; they cannot maneuver in any way, nor stop, nor change direction. Two Empire fighters act as “Escorts”, who can boost the speed of the canisters if the fighters stay within one range band of a canister (or canisters). Meanwhile, the Rebels designate a ship to be the “thief,” which can attempt to snatch a single canister at the end of the movement phase, if the canister is within one range band of the “thief” vessel. (The Rebels have the advantage of being able to shift which ship is the “thief” at the end of the planning phase. The Empire has the advantage that if an Escort is destroyed, another vessel automatically becomes an escort... if they have any vessels left.)

The victory conditions are simple: The Empire must successfully escort at least two of the containers across the battlespace (a our table was 4’ long, we marked the correct distance with a line of asteroids that were otherwise not considered as elements of the battle). The Rebels must successfully steal two containers to win. Note that while destruction of the enemy is certainly helpful, it isn’t necessary, and the Empire can still win even if all its vessels are destroyed, if the Rebels fail to snatch the containers!

Though the book suggests a 100-point per side battle, I wanted to max out the Rebel forces as much as I could, and do the same for the Empire. The result gave 165 points  to each side, which I ran as a solo test scenario (ending in a narrow Empire victory). It seemed to work well, so I offered the same set up to my gaming group.

The Battle Begins
Note that the Rebels can set up very close to the Empire in this scenario; combat begins immediately!

The Forces:


Rebels (165)

Millennium Falcon YT-1300
Chewbacca as pilot
Nien Nunb as crew
MF Title Upgrade
Elusiveness Upgrade
Engine Upgrade
Assault Missiles
Wedge Antilles X-wing
R2F2
Proton Torpedoes
Luke Skywalker X-wing
R2D2
Proton Torpedoes
Deadeye
Biggs Darklighter X-wing
R5D8
Proton Torpedoes

Empire (165)

Turr Phennir TIE Interceptor
Marksmanship
Soontir Fel TIE Interceptor
Daredevil
Howlgunner TIE
Swarm Tactics
Backstabber TIE
Night Beast TIE
Dark Curse TIE
Winged Gundark TIE
Academy Rookie TIE

(The above may be off; I forgot to record all of the upgrade cards, and I’m working from memory.)

The Commanders
Rebels:
Commander Will, controlling the Millennium Falcon and Wedge Antilles.
Commander Not Appearing In These Photos (AKA yours truly), controlling Luke Skywalker and Biggs Darklighter.

Empire:
Darth Jim
Darth Alexander
Darth Ben (No, Not *That* Ben)

 I can’t recall who controlled what on the Empire side, but the forces were pretty well split up evenly. I think Darth Jim and Darth Ben (No, Not *That* Ben) controlled one each of the Escort vessels, as well a support fighter each, while Darth Alexander was assigned to general assault detail with a squadron of three TIEs.

First Blood
Darth Ben's wingman goes down early, and the Falcon swoops in on the first canister (token in foreground).
Will and I planned a bait-and-switch with the “thief” vessel, starting off with the Falcon assigned to snatch the canisters, to draw the Emperor’s forces away from Luke’s X-wing, so we could switch to it mid-battle. It didn’t quite work that way, as the Empire had a lot of fighters to throw around, but things got hairy around the Falcon very quickly. In a boost to the Rebel side, the Falcon snatched the central canister fairly early on, so we left it in charge of going after the next canister.


Hairy Furball
Ya know, all  those TIEs were *supposed* to chase the Falcon!
The Empire however, interrupted this effort, boosting one of the remaining canisters quickly across the battlefield, while the Falcon and Wedge were drawn off from the canister moving up the far side, and got bottled up in a dogfight with the TIEs. Darth Ben (No, Not *That* Ben) saw his TIES blow up rapidly, much to his despair (see photo above and below).

Why you? Because it's Star Wars, and nobody named Ben is gonna survive to the end...
Meanwhile Darth Alexander proved quite deft at both his shooting, taking out the vaunted Wedge Antilles (“So, I guess he’s not the ‘one other’ you meant, Yoda?”), and his dodging, avoiding all attempts to clobber his last TIE! (See his “moment of triumph” picture as he dodges the crit that would have taken him down... yes, fired by Dad...)

Wedge bites the big one, courtesy smilin' Darth Alexander.
Another TIE bites the dust...
Smilin' Darth Alexander celebrates the Dark Side of the Force.
With both sides now caught out of position, the battle became a desperate race to reach the last canister, which had slowly been crawling through space. The escorts were too far from the canister to assist it, but the Rebels were too far away to capture it. The game might well come down to which side got close enough to use their ability on the lone pod! 

The Rebel commanders realized that it was time to call the switch. Luke took over “thief” duties from Chewie, and roared full tilt after the distant cargo pod, with the Falcon acting to block the escort TIES from catching up. The asteroid field loomed close as Luke drew near— there was little time for targeting; it was grab or give up!

“Use the Force, Luke!”
“Uh, Ben?” (Yes, *that* Ben.)
“Yes, you ninny! Who did you think it was, Avon calling? NOW SHUT UP AND USE THE FRICKIN’ FORCE!”

Staring off into space with a vague expression that was supposed to be intense concentration, Luke activated the tractor beam on his X-wing (didn’t know they had one, did you? Ain’t retconning grand?)...

Stealing a Win!
(Needed more crits than evades on equal dice! And holy cheese, it happened!)
... and snatched the final canister!!!


Victory: REBELS (Again...)


The Rebels soared off with their prize, the Empire slunk away in despair (expecting another round of “abrupt resignations”), and supermarket magazine racks across the galaxy displayed very embarrassing photos of the Emperor’s feminine undies.

(“That’s alleged feminine undies!”— The Imperial Office of Truth and Selective Openness.)

Wrap Up


Although another Rebel victory, this time it was definitely a close call; the force matchup was nearly perfect. Had the Empire boosted the canister a little sooner, or had the Force turned against Luke, this would have been an Empire win. The photos don’t show the number of hits all sides had been taking— the MF was shieldless, with hull hits mounting up, and only R2D2 was holding Luke together, rebuilding his shields to block what at any moment could be a killing blow (two hits out of three hull points). Ironically, Biggs Darklighter, the pilot whose ability is to make people shoot him (!) was soaring along quite unperturbed. (Of course, the TIEs kept maneuvering to keep Biggs out of their firing arcs so they could focus on Luke or the Falcon. Sneaky little blighters...)

Really, victory came down to a dice roll, and a rather improbable one at that, since the “thief’s” dice and the canister’s dice are equal, and the “thief” has to roll more crit results  (1 in 8 per die, or 12.5% odds) than the defender rolls evade results (2 in 8 per die, or 25% odds). I rolled one crit for Luke; even a single evade would have stopped the attempt... and none appeared. (There was much cheering for this result on the Rebel side, and much groaning from the Empire side.)

In the end, we had a well-fought match. As with most X-wing dogfights with lots of ships, we frequently found ourselves blocking each others’ actions because of the overlap rules, although in some cases this was deliberate. It can be tricky to remember who’s moving first when you’re planning your maneuver; if you forget that someone will (or won’t) be in the same spot as they currently are when your ship moves, it can mess up your plans.

Overall, I really enjoyed this scenario. It certainly forced us to make different tactical decisions than we otherwise would in order to meet the goals of either snatching the canisters or getting them across space as quickly as possible. For both sides, you have to realize that maneuvering to attack the enemy may not be the best choice for a given situation. Indeed, as the Rebel force, we realized that in some cases shooting the escort vessel might be a bad idea, if it would cause another TIE to take over escort duties and boost a canister that otherwise would be moving more slowly.

I can certainly see that we’ll be trying more of the suggested scenarios, and sticking fairly closely to the points system for future battles.

Thanks for reading, and may the Force be with you!

--- Commander Parzival, the Wargamesmonger


Wednesday, July 17, 2013

It's a Frickin' Flying Shark!

Okay, there's been a lot going on which I have to blog about, but I'm wanting to get something up, and this seems timely.

In honor of the recent release of one of what must be the Greatest Movies Ever Made for a Minor Cable Channel, that masterpiece of cinematic excess, the incomparable Sharknado (google it, if you've been living in ignorance), I present The FRICKIN' FLYING SHARK!

Download it, size it to fit 8.5" x 11" paper, print it on card stock, cut, glue, assemble and throw as directed. Make a passel of 'em and you can create your very on whirling cyclone of carchardon carchariases, aka Great White Sharks.

You will need something to weight the nose, and you may have to fiddle a bit to get a decent gliding action, but it will fly.

And it's just in time for the next showing of Sharknado.

Aren't you happy now? :-)

--- Howard Shirley

P.S. If your friends want this (and of course they will), please send them directly to my blog to download their own copy. Yeah, it's a shameless way to build viewership, but hey, where else can you get such an awesome shark glider for free!


P.P.S. A few tips:

The glider may have tendency to stall. You can adjust this by making a small slit in the rear of the wing centerline (or making the slit in the fish itself longer towards the rear) and sliding the wing backwards, or by adding more weight around the nose.
Also, a gentle wrist throw will be much more satisfactory than an arm throw. Think "light toss" rather than "big hurl."

Sunday, March 24, 2013

Back to Earth and Back in Time


Getting the Drop on Some Germans...

Some of the stuff in the box.
Well, we’ve been in fantasy land and a galaxy far, far away... maybe it’s time for a return to Earth!

Now, if you know wargames, well, there are wargames and there are wargames. Some players are fond of extremely complex historical simulations, with lots of specific unit counters and intense rules and sub-rules and sub-sub-rules. While there’s a lot of fun in that, personally I favor a more relaxed type of game— not the least reason being that less-complicated games, as a rule, tend to play a bit quicker. That works out well with my limited gaming schedule, and also means I’m more likely to entice my teenage son into spending an hour or so facing the old man across a table. (If you’ve got a teenager, you know that’s quite a feat to pull off— especially if food isn’t involved.)

A New Classic: Memoir '44

One of the games that will draw my son in is Memoir ’44 by Days of Wonder. Created by Richard Borg, this recreation of World War II battlefield warfare is both pleasingly simple, yet surprisingly effective at capturing the feel of the era— and it’s challenging and fun to play.

If you’ve ever played Borg’s Battle Cry (Wizards of the Coast/Hasbro), BattleLore (Fantasy Flight Games), or Command & Colors (GMT), you’re already familiar with the basic concepts of the game: Two armies face each other across a large hex map, with terrain features represented by hex tiles (allowing for multiple scenarios to be easily created with the same features). The battlefield is divided into three equal sections by dashed red lines: Left Flank, Right Flank, and Center (always relative to the player’s view; one player’s “left” is the other’s “right”).
Control of the forces is determined by a hand of cards, drawn by both players from the same deck. Each card designates one or more sections in which a player may issue orders to his troops, as well as the number of those troops which may move and fight in that section. So, for example, a card may state that the player can move and fight with two units on the Right Flank. If played, the player may only move and shoot with two units, and those units must be in the rightmost section of the battlefield (relative to the player’s view). If the player doesn’t have any units in that section, the card is useless. If he has only one, he can move it but the extra unit move is ignored. If he has three or more units in the Right Flank, he can choose which two move and fight, but the rest do nothing. There are also cards with special effects, like restoring lost forces, or calling in artillery barrages and “air strikes” (basically, attacks against any enemy unit, regardless of location), and more.
Terrain affects movement, offers protection from attacks and/or limits the ability to attack, and blocks line of sight. Terrain includes hills, forests, waterways, towns, hedgerows, etc., as well as special features like bridges, fords, bunkers and so on.
Units typically consist of two, three or four figures, depending on whether the unit is “artillery,” “armor,” or “infantry,” respectively. The figures represent the “hit points” of a unit— one hit removes one figure, which is an easy and effective tracking system. Otherwise a unit’s strength remains the same regardless of how many hits it takes. If a unit typically rolls three combat dice, it rolls three dice whether it has four figures or one remaining. Otherwise the number of dice can be modified by range or terrain effects (usually a penalty), or boosted by special cards.
The dice are unique, displaying images representing infantry (2 sides), armor (tanks), a grenade, a flag and a star. If you roll the symbol of the unit being attacked, each symbol equals one hit on that unit (the “tank” symbol represents hits against both armor and artillery). The grenade is a “wild” hit that applies to any unit, the flag forces a unit to retreat a hex (1 hex per flag rolled), and the star is usually a miss (certain cards can change this). Note that while infantry units take more hits, they are more likely to be hit than others (50% chance vs. 33% chance).

The game is played in scenarios based on actual WW2 battles, sometimes with special scenario rules based on the history of the event. Victory is gained by eliminating complete enemy units— one “Victory Medal” for each unit, regardless of type— or by achieving battlefield objectives (usually taking and holding a specific town, hill, bridge or other terrain feature). Typically a side must amass four to six Victory Medals to win, as set by the scenario. The first force to achieve the required total wins the battle.

And that’s pretty much it— simple, but quite versatile in play, and very challenging as you struggle to plan how to use your cards most effectively... especially as each player is limited to a hand of six or fewer cards, depending on the skill of the historical commanders for each side. Since you don’t know what new card you will draw at the end of your turn, you can’t be certain that your strategy will work as planned. If you’re not careful, you might even wind up with your forces essentially stuck in one section of the battlefield, unable to take action because you don’t have a card for that section in your hand!
My son and I have played the game several times, but as we’d not touched it in a while, I opted for a simpler scenario to get started— but it’s no less an important battle for that!

The D-Hour of D-Day

The scenario selected was in fact the first battle of D-Day. In the early darkness of June 6, 1944, gliders filled with British commandos flew behind German lines into Occupied France. Their objective: seize two key bridges across the Caen Canal and the Orne River, and hold them for the Allied advance later that day (assuming, of course, the Allies were successful in defeating the German defenses at Normandy). In history, the gliders landed with pin-point accuracy, giving the commandos complete surprise on the German defenders, and both bridges were swiftly secured. Although two separate bridges across separate waterways were involved, the battle has always been named after the bridge over the canal and the famous “flying horse” badges of the men who captured it— the Battle of Pegasus Bridge.

The Battle of Pegasus Bridge

The Beginning of the Battle: The gliders have landed.
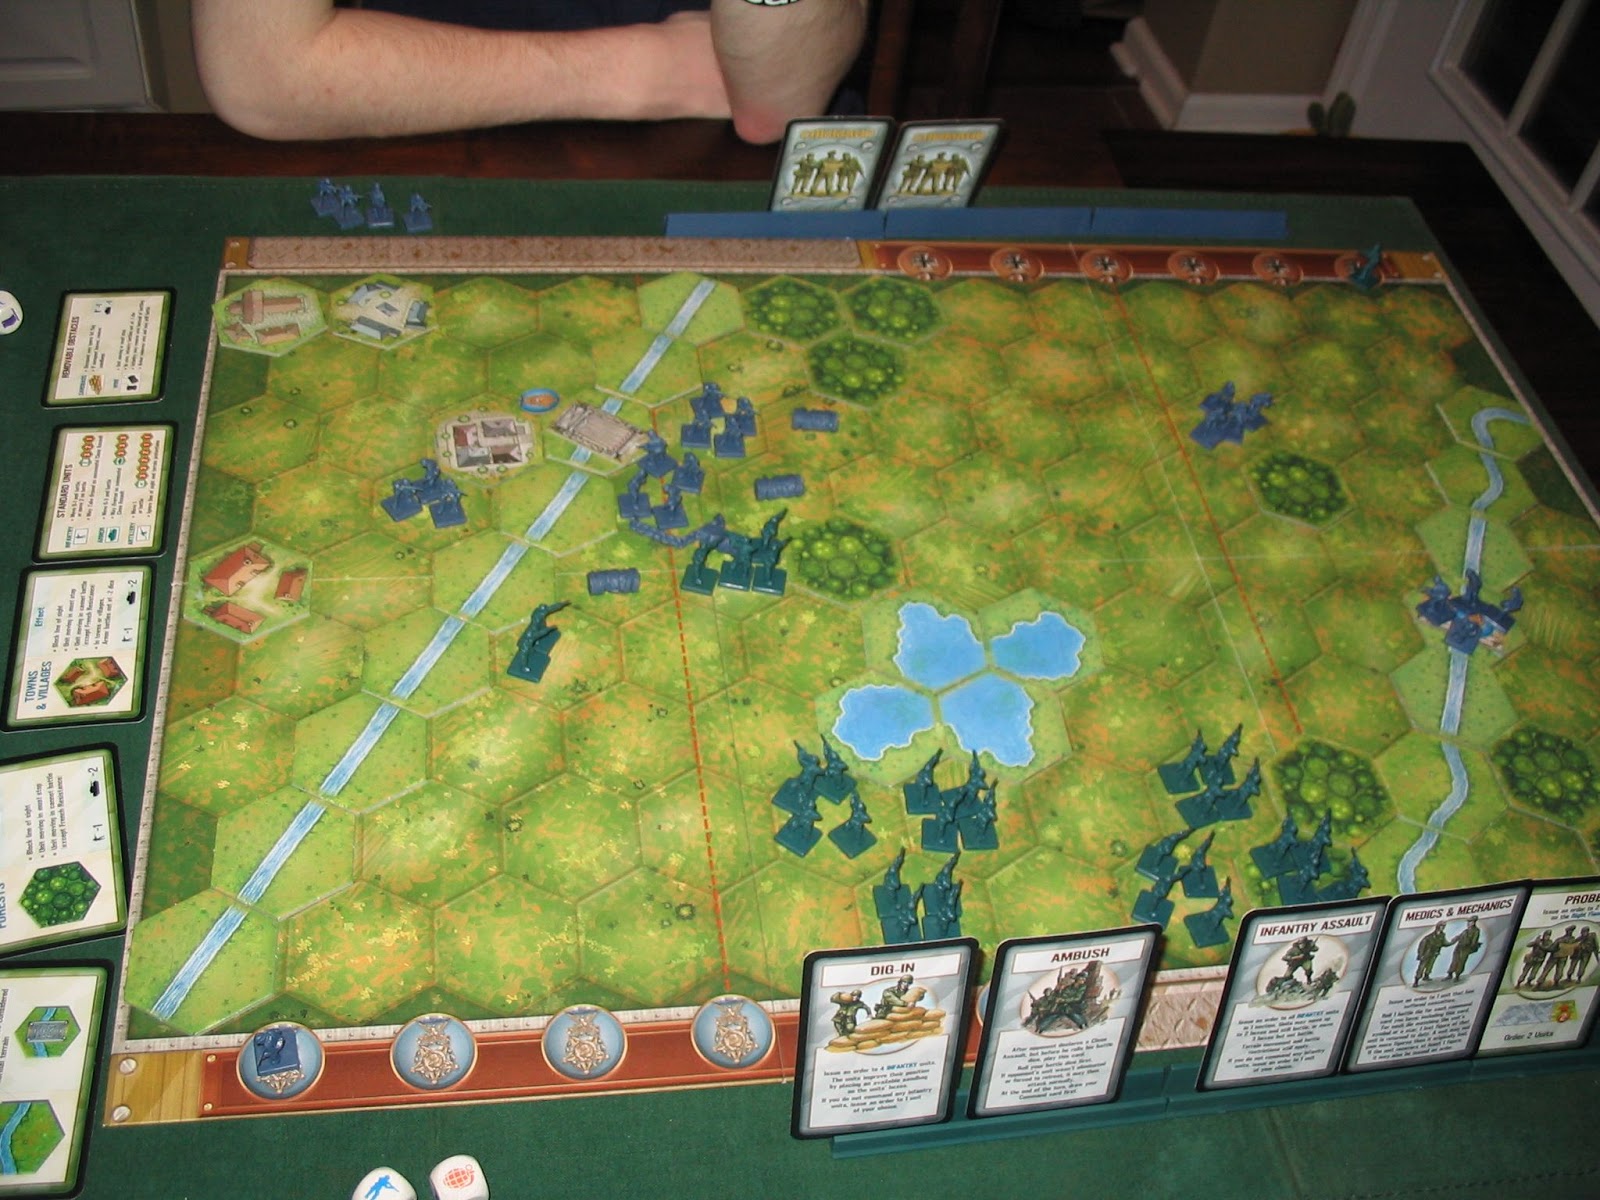
The scenario begins with the gliders already “landed” and the troops deployed. The view is from the Allied Commander’s “side,” so I will refer to the battlefield sections accordingly. In the Left Flank are the Pegasus Bridge and canal (no units may cross the canal except at the bridge; however, they may freely shoot at enemies across the canal). In the Center is an impassable pond and a few woods (the latter block line of sight, stop a unit’s movement when entered, and provide a -1 attack dice protection for a unit inside a wood). To the Right Flank are the Orne River and bridge. Grey units are German infantry, Green units are British infantry (green figures are interchangeable among the Allies, depending on scenario, so some visual discrepancies from the actual troops present should be forgiven).

To reflect that the Germans were caught unprepared, the German Commander begins the battle with only two command cards versus the Allied Commander’s six. However, the German commander adds an additional card each turn (as he “comes to grip” with the situation), though his maximum hand size is four cards. That might seem unfair, but watch as the fight progresses and you’ll see that even an undersized hand can be very, very good.

In this scenario (and in history) the British commandos have the first move. Alas, I didn’t have particularly great command cards, but I could at least advance a few forces here and there. I opted to start off with an attack on the forces guarding the canal bridge, in hopes of driving them back and gaining some early Victory Medals (note that in this scenario, the two bridges each represent a Victory Objective for the British side— one Victory Medal each towards the required goal of four).
Early A.M., June 6, 1944: The commandos advance...
My initial charge clearly caught the Germans half asleep. Despite being hampered by barbed wire (the grey “jelly rolls” on the board), which penalize attacks by one die for any infantry shooting from the barbed hex, I managed to wipe out one entire infantry unit— one Victory Medal gained in the very first move!
The German Commander responded with an echoing move, bringing up his forces on my Left Flank to protect the bridge. He also succeeded in reducing my leading unit by half. No commander likes to see that!
The Brits face stiff resistance!

Turn 2 saw the Germans far more ready for battle, issuing orders to units on both the Right and Left Flanks! (A “Pincer Move” card— wish I’d had it.) On the Right, he occupied the Orne Bridge, preventing an easy grab by me, while on the Left, he took out my weakened unit and set up a fire team across the canal to harass my supporting troops! 1 Victory Medal for him— (Lucky kid. Grumble.)
(You can see in the photo that I had limited card choices. Two were for my Right, where I had zero forces, and I had drawn no moves for the Left, where the action was the hottest!)
Bringing in the reserves— one hopes not too early.
I decided to use an “Infantry Assault” card, which allows all the infantry in any one section to move (and move an extra hex, too). Although I had wanted to use it when I could actually turn the move into a broader firefight, I decided I had to bring in my back reserves to shore up my badly mauled Left. I also moved units into the Right flank to menace the Orne Bridge. On both sides I managed to weaken his forces, but gained no VMs.

Still, I thought things were looking up... but the German Commander had other tricks up his short sleeves.

What Happened?!?

The Jerries fight back! I say, that smarts.
Look at that photo. Just look at it. WHAM. I lost another whole unit on the Left, underwent a general retreat there, and saw my Right almost shattered by two guys running off a bridge! Another one of those dang Pincer Moves— what, do they print them in Berlin? Now the kid had two VMs to my one! Blimey!
Oh yeah? Well... take that!
Fine. I had forces on the right now, so I could use that blasted Probe card I’d had since turn one, and attacked with two units. RAT-A-TAT-TAT! Those two Jerries should’ve stayed on the bridge. That gained me a second VM, too, and allowed my attacking unit to immediately gain a free advance into the space vacated by the enemy— one step away from claiming the Orne bridge!

But Fritz wasn’t done yet— he responded in the same area, and took out a three-man unit! (Lousy dice— bet they were made in Berlin, too.) Now he had three VMs— just one away from victory.
That could not be allowed to happen! History was at stake! Plus, he’d lord it over me for the rest of the night!
A battle in the balance...
Time to pull out the secret weapon. MUAH-HA-HA... wait, that’s probably not right for this genre.
Uh... “For King and...”
No, these chaps probably just yelled, “At ‘em, lads!”
I played the “Behind Enemy Lines” card, which allowed me to advance one unit three hexes (normal max is two), fight, and advance three more hexes. Roaring out of the woods, a fresh unit of commandos poured down on the German left, avenging the lost British comrades and then racing to claim the undefended "Horsa" Bridge.
HISTORY IS SAVED!
It was a timely play, as that move netted me two VMs and the game. 
Victory for the Brits! Huzzah! Huzzah! Huzzah!

T’was yours truly who claimed the laurels for the evening— though, very nobly, I did not lord it over my son, but offered him a gentleman’s handshake. That’s sweet victory enough for the old man.

After Action Debriefing

My son put up a good fight, and the game was in the balance down to the last (one mark of just how good a game Memoir ’44 is). If I hadn’t drawn the Behind Enemy Lines card, I’d have been facing real trouble. (I will note that I had the Ambush card, and completely failed to use it an opportune moment— not an unusual drawback for a card you play out of turn. One has to remember one has it when the other guy makes his move. Instead, I was too busy reacting to the danger to recall I had a handy solution. "Typical officer," my men probably muttered.)

In any case, even this basic scenario (which features only infantry) is a solid challenge and a lot of fun. If you have the game, I hope I’ve whetted your appetite to pull it out again. If not, I encourage you to find a copy!

--- Howard Shirley

P.S. Oddly enough, my version of the game— which I picked up used— did not have enough components to actually lay out the Pegasus Bridge terrain as pictured in the book— there simply aren’t enough canals (straight waterways). I think, however, that's probably true of the standard boxed game, too, as the component count is right for my set. So in setting this up, you have to use the curvy river pieces instead. The game effects aren’t any different, but I find the straight components fit actual overhead pictures of the canal and river at the time:
The "Pegasus" Bridge and Caen Canal (upper left)
and "Horsa" Bridge and Orne River (middle left)
Horsa gliders (for which the Orne Bridge was renamed) can be seen in the photo as well (click to enlarge).

Fortunately, I also have the Terrain Pack expansion set, and between the two I could approximate a somewhat “historical” look.