Showing posts with label review. Show all posts

Tuesday, November 30, 2021

Kickin’ Orcs Old School: The Return of HeroQuest, Part II

HeroQuest, if you don’t already know, is a “dungeon crawl” game. A “dungeon crawl” typically features a small team of classic fantasy heroes exploring an underground labyrinth, encountering dangerous monsters and deadly traps which they must overcome or escape, while looting the place of all sorts of fabulous (or even magical) treasures. And if you think “that sounds like Dungeons & Dragons” you would be right— the whole idea is lifted straight from the origins of the famous father of all role-playing games. But unlike D&D, which typically places heavy emphasis on developing and improving a “realistic” fantasy character in an in-depth, grand fantasy world, a dungeon crawl just deals with the basic guts— kill the monsters, take their stuff. The heroes don’t have elaborate backgrounds or long lists of equipment. They’re archetypes— the Barbarian, the Elf, the Dwarf and the Wizard— and their abilities are largely static and unchanging. And while there may indeed be a thematic plot sold in epic hero terms, that’s really just fluff— the game isn’t about that, it’s about “shootin’, lootin’ and scootin’.” 

And that’s essentially what HeroQuest is— each player controls one of four archetypal heroes, working together as a team to defeat the monsters, complete the goals of a quest, and get out with plenty of gold. There’s no heavy roleplay involved, nor any character or world development.


The heroes are ready. The quest awaits...

Now, as I said, this game is actually quite “old,” being essentially a reproduction (and minor revision) of the original Milton Bradley game of 1989. So this review probably won’t cover any ground-breaking revelations. There aren’t any “cool” new mechanics or ideas involved. It’s old school, 1980’s era game design— but that old school style is still a lot of fun, and worth the reviving.

How It Works

Play is simple. The game can be played by 2 to 5 people (or, with the new app, solo— which I’ll touch on in a later blog). One person must be “the evil wizard Zargon,” which is really just the person who controls all the monsters and reveals the areas and surprises of the dungeon as the game goes along. The other players take on the roles of the four heroes, who must enter the various dungeons in the game and face Zargon’s vile minions. Ostensibly, Zargon “wins” by defeating the heroes— either killing them, or forcing them to flee without completing the goal of a given quest. The heroes “win” by achieving that same goal and acquiring treasure in the process. However, Zargon losing isn’t really much of a loss— the pleasure of being Zargon comes from seeing the others struggle against the challenges of the quest, even if the heroes win. So while the game is set up as oppositional, that’s not the heavy emphasis, and it doesn’t have to be played that way.


Heroes take turns, in order, performing a limited selection of possibilities: Move and take one of six possible “Actions:” Attack, Cast a Spell, Search for Treasure, Search for Secret Doors, Search for Traps, or Disarm a Trap. The action can be taken before or after moving, but moving cannot be split around an action. Two dice are typically rolled to see how far a hero can move, but the hero doesn’t have to move the full amount (and at times won’t be able to do so).

An attack is done by rolling a number of dice equal to the attacker’s Attack Strength; the target may then roll a number of dice equal to the target’s Defense Strength. The dice are unique to the game, featuring images of skulls (three of these), two white shields and one black shield. Hits are made when skulls are rolled; shield results block hits (white shields for heroes defending, the black shield for monsters defending).

Spells are on cards. Cast a spell, and it’s gone— it cannot be recovered for the current quest. Spells typically do things like heal heroes, cause special attacks against monsters, boost a hero’s attack or defense, or grant a hero a one-use special power (as moving through walls).


Once all heroes have each had a turn, the monsters take a turn, moving and attacking as the Zargon player wishes, in the same manner as the heroes. Some monsters can also cast spells.


Those are pretty much the rules, aside from some details about how traps and secret doors are handled. Treasure is found in two ways— certain rooms have unique treasures or other discoveries defined by the Quest Book. Otherwise, treasure is randomly drawn from a deck of cards— but this deck also contains surprises like “hazards” (unavoidable traps) and “wandering monsters” which immediately attack the searcher. Otherwise the whole game simply involves exploring the dungeon and dealing with what you find, then getting out.


How It Plays

I started my experience with the game playing solo against Hasbro’s new (free) HeroQuest Companion App (I have the iOS version for my Apple iPad). This app handles the role of Zargon, so that a game can be played solo (with the player controlling all four heroes), or so a group of four can play the game with everyone being a hero, and the app being Zargon. (More about the app itself in a later blog.)


At first, I’ll admit that I found the board game play very simplistic, and the initial quests very easy. But after getting several quests under my belt, I suddenly ran into one that nearly wiped my party of heroes out— we were dashing to escape with our lives hanging on by one or two “Body Points” (the game’s term for hit points or wounds, which depending on hero range from 4 to 8). Suddenly I found myself respecting this old, “simple” game.


Later, when I took over as Zargon for my friends, I was surprised to discover that first quest, which I had thought too easy, was almost a death sentence for my buddies— indeed, they did lose one hero (the Wizard) to a combination of hazards and a well-rolled monster attack. When it all ended and the Big Bad Monster bit the dust, the remainder of the team were out of spells and almost out of lives— and glad to abandon the dungeon, despite knowing they were leaving potential treasure behind.


Now, part of the reason for that is as Zargon, I play with a little better tactical and strategic sense than the app does— going for high value hero targets (like the Wizard), retreating for better tactical conditions, etc.. But my players also ran into some horrendous luck— monsters improbably blocking multiple hits, treasure searches producing more hazards and monsters than treasure, and so on. Still, even with that accounted for, the game wound up being more exciting (and tense) than I had thought— proof that once again, the old school can be a very good school!


...and the trouble begins!
Defend yourselves, brave heroes-- if you can. MUA-HA-HA-HA-HA!

What’s to Like

HeroQuest is fun— there’s no question. If you want that old school fantasy game experience and you’re not wanting a heavy evening of roleplay, negotiations, and rules minutiae, HeroQuest will certainly satisfy that itch. And unlike many dungeon crawl games— TSR/WotC’s Dungeon!, Ganesha Games’ Four Against Darkness, SJG’s Munchkin, and the various dice or card-based dungeon games, HeroQuest allows for and requires tactical thinking in combat— it matters where and how your hero moves and stands, and the equipment can allow for good tactical advantages beyond just increasing the die roll. Also, the game is simpler and purer in its approach than current popular takes like GW’s new Warhammer Quest, Flying Frog's Shadows of Brimstone, FFG’s Descent, Cephalofair Games' Gloomhaven, and the like (some of which I have played, some not). It’s dead easy to pick up, and doesn’t require reading lengthy rules or attention to heavy details. (Plus, the ability to move either before or after an action is not a trivial difference to most of these games— hit and run away is a viable tactic in HeroQuest, if not essential!)

The app (again, in an upcoming blog post) allows for the potential Zargon player to experience the quest for himself, playing as the heroes before he reads the entry in the Quest Book.


There’s a lot of tactile appeal to the game— the miniatures and the three-dimensional dungeon furnishings are terrific to look at, have a nice heft, and can be painted (though this isn’t necessary to play). The dice are unique and fun to roll— who doesn’t like seeing results consisting of skulls, shields, and scary monster faces? The card artwork is solid as well— there’s nothing to take you out of the experience of the game. There’s a special screen for Zargon to hide the details of the Quest from the players, though to be honest, it’s not all that necessary. I think it was included in the original 1989 game as a way to “look” like 1980s D&D with its famous “Dungeon Master’s Screen” element. But it’s fun, and the artwork is nicely evocative, with its depiction of a brooding wizard “controlling” his dark minions.


Playing time is quick— about an hour and a half or even less to complete most “quests,” making this a great game for quenching that fantasy thirst in a single evening. This also helps keep the player elimination aspect from being a drag on the evening— usually a hero death won’t happen until the final boss fight, so everyone stays engaged during play.


There are a total of 14 adventures in the included Quest Book, as well as instructions for creating original quests— but 14 gaming nights is a pretty good run for any adventure game. Also, Hasbro has already produced two expansion quests sets (“sold separately”), and has materials to do at least three more. (I purchased my game through Hasbro’s “HasbroPulse” crowd-funding sight— an in-house version of Kickstarter. I went whole hog, and wound up getting all the expansions then produced, with extra miniatures.)


The heroes are presented as three males (Barbarian, Dwarf and Wizard) and one female (the Elf), but the crowd-funding effort also produced counterparts to these, as well as four additional hero choices. I imagine these may wind up being sold in an expansion set, if your players want a personal connection to their heroes. It really doesn’t matter in play— nothing about the game expects male or female or distinguishes between the two, aside from some art. Otherwise, the female Barbarian has the exact same abilities and levels as the male Barbarian, and so on. And if you do collect or play other games with miniatures, you can easily substitute these for the figures included in the boxed set. (For those interested, just eyeballing ‘em, the scale appears to be “heroic” 28mm— certainly no more than 32mm.)


The rulebook is clear and easy to read. Some elements might be slightly out of place (the rules for purchasing equipment are presented in the section about Searching for Treasure, though the purchases can only happen after a quest has ended, which is discussed at the end of the rule book). But for the most part, everything is easy to follow and find. There are a few discrepancies between the text on some of the cards and the rules. For example, some spells are line of sight, and the cards so state, but others aren’t clear on that point (as the various healing spells). Also, the various “dangerous” Treasure cards say to return the card to the bottom of the deck, while the rules say to reshuffle the Treasure deck every time a hazard or wandering monster card is drawn. Which applies? My group decided the rulebook superseded the card. (I would propose putting the card on the bottom of the deck and reshuffling only after an actual treasure is drawn as an interesting house rule, but I haven’t yet tried that.) And the Dagger equipment card says it can be thrown as a missile weapon (at which point it is lost), but the Wizard has a Dagger as standard equipment, with no indication this can either be thrown or lost. We decided that dagger wasn’t balanced for throwing (or he was very sentimental about it).


The Quest Book is also well done and clear. The few “read aloud” passages are evocative, but I also recommend that the Zargon player add some flavor of his own from time to time when placing the items and monsters in a room. But that’s just my approach, and certainly isn’t required.


For Parents: Nothing to Fear

The box says the game is for ages 14+. I’m not certain why this age is set so high. The game should be easily grasped by ages 10 and up, or even with adult guidance, kids 8 and up. There’s some reading to be done, but it’s quite clear, and there isn’t any objectionable material in the game that I can see. The art and figures are tasteful, there’s no presentation of gore, and what violence there is is abstracted into dice rolls. I suppose a few of the monsters are “scary,” but on a level about as frightening as creatures in a Power Rangers episode. I suppose parents stuck in 1980s Moral Panic mode might see the Gargoyle as demonic looking, but he’s presented as a magical creature of living stone (and was back then, too), to the extent that he’s presented as anything other than a Big Boss Monster. The other foes are classic Games Workshop style goblins (little, mean and green), orcs (big mean and green), “abominations” (who look like giant fish-headed trolls), “Dread Warriors” (big men in heavy armor), and mummies, zombies and skeletons straight out of stop-motion movies like Jason and the Argonauts. There’s also “Dread Sorcerer” who is a skeletal wizard, but no where near as alarming as something in Harry Potter. So if you’ve got a kid who likes books like The Hobbit, Harry Potter, or just Saturday-morning adventure cartoons, he (or she) will eagerly embrace HeroQuest. Younger kids might struggle with what to do without adult guidance, and yes, a hero can die, eliminating a player from the game— but the eliminated player could easily become Zargon’s “assistant,” controlling one or more monsters in combat and helping to place out the various dungeon furnishings.

Lit'l Zar-zilla is ready to play!

What’s Not to Like

Very little. The one thing potentially lacking is some strategic decision-making for the Zargon player. The quests are largely static (with a few exceptions)— the monsters wait in place until the heroes discover them, and the only “wandering monster” aspect is triggered by hero treasure searches— if the heroes don’t search, no new monsters can appear. So once the monsters in an area have been defeated, there’s nothing for Zargon to do on his turn until the heroes enter a new area. Fortunately the dungeons are relatively compact, so the downtime for Zargon is minimal.


The game also requires the surviving heroes to return to the stairway where they entered the dungeon to complete the quest— but by the time the heroes have pulled off the main goal, there’s rarely any opposition to stop this movement, and the dice rolling for it becomes a bit pointless. As Zargon, I simply waved away this rolling and movement when the players indicated they weren’t going to explore further, but just wanted to escape. Since they therefore wouldn’t trigger any encounters, the game was effectively over. It seems to me an element of “monster spawning” might be good to allow for the retreat to be more than just retracing one’s steps unopposed. But that’s a quibble, and it may be that further quests in the Quest Book address this (I’m only about halfway through).


Another (minor) quibble is with the Equipment. Between quests, the heroes can purchase weapons, armor and other items to improve their abilities, all presented on cards. (There’s no supply limit on these, but one could house rule limitations based on the number of cards, if one likes). There are some nice elements here, but they feel a bit limited in scope and influence on the game. And, aside from magical items in the quests (most of which so far have been one-time use potions), there’s no other way to improve a hero— there are no experience points or “leveling up” in the core game. On the other hand, simplicity has its virtue, so this objection is, as I said, very minor and probably personal to my own tastes.


And a Good Time Was Had By All…


That’s really the standard of a great game, isn’t it? That it’s fun to play, and everyone enjoys the experience— win or lose. Under that standard, HeroQuest isn’t just great, it’s terrific. It captures the theme perfectly, both in components and game play. It’s fast, easy to grasp, yet also nicely tactical— it challenges you to think a little before and during your turn. The randomness is present, but it’s not overwhelming— the player does have a sense of control over his actions, but not over the results, and to me that combination makes for an ideal and enjoyable game.

Despite being nominally oppositional between the hero players and the Zargon player, in many ways the game is cooperative not only among the hero players but also with Zargon. Even as the Zargon player acts to fight and defeat the heroes, he’s really engaging in a collaborative effort to produce a fun fantasy experience. There’s no sense of true opposition, or any impulse for cutthroat competition among the players (not that there’s anything wrong with that ;-) ). It’s just a grand time at the table, imagining being heroes facing fearsome foes— even if one of the players controls those foes. For that dungeon crawl itch, HeroQuest is a very satisfying backscratcher.


Sew five stars on the wizard’s hat for this one.


-- Howard Shirley, aka Parzival


Oh no! A wandering goblin leapt out from behind the comfy chair! My Wizard is in peril!
Lit'l Zar-zilla: "ROAR-HA-HA-HA-HA!


Monday, November 11, 2013

A Home for Warriors: Building the Laser Cut Fortress from Sally 4th

A late wind rises above the fields, carrying with it the sounds of leather slapping against metal, the clop of hooves on stone, and high upon the breeze the sound of one lone horn calling out in greeting, “Open the gates! The lords have returned from battle!”


Forth, Eolingas!


THE PROJECT

Every army needs a home, a place to muster, to train, and to occasionally defend in a desperate fight against overwhelming odds (or to try and assault with the same). While I have praised (and still do) the excellent paper Kragenvale Keep (review here), I also wanted something a bit more generic (and potentially more imposing). So when Sally 4th, a new manufacture based in the United Kingdom, announced a line of laser cut MDF fortresses, I was intrigued. In fact, I suggested on The Miniatures Page that they consider a 10mm line scaled for Warmaster’s 20mm x 40mm bases... and lo and behold, they did just that. When they also tacked on a sale, I couldn’t resist. Carefully leading my lovely spouse to the computer, I pointed at the screen, said “This is my birthday present from you. Click the button.” And she was more than happy to comply.

As I’d promised myself that I would complete other projects before tackling a new one, I set my present aside and waited. Finally, this weekend I put on my construction hat, opened the package, and went to work.


THE FORTRESS

I had opted to create a small fortress consisting of four towers, three wall sections, and a gateway. (Let me take a moment to praise the company. When I first received the shipment, my examination of the contents revealed a few pieces that were damaged in shipping. I sent an e-mail to Sally 4th, and promptly received all the necessary replacement parts and a bonus of 5 little siege ladders.) Not certain how long the process would take, I noted that the towers looked the least complicated, as well as the most versatile (a lone tower is a viable scenario piece, whereas a lone wall or gateway just looks odd). So I decided to begin with this piece.


THE TOWERS

The parts of the tower.
At the bottom of the picture are two broken battlement sections
 as well as the siege ladders Sally 4th sent as a bonus.
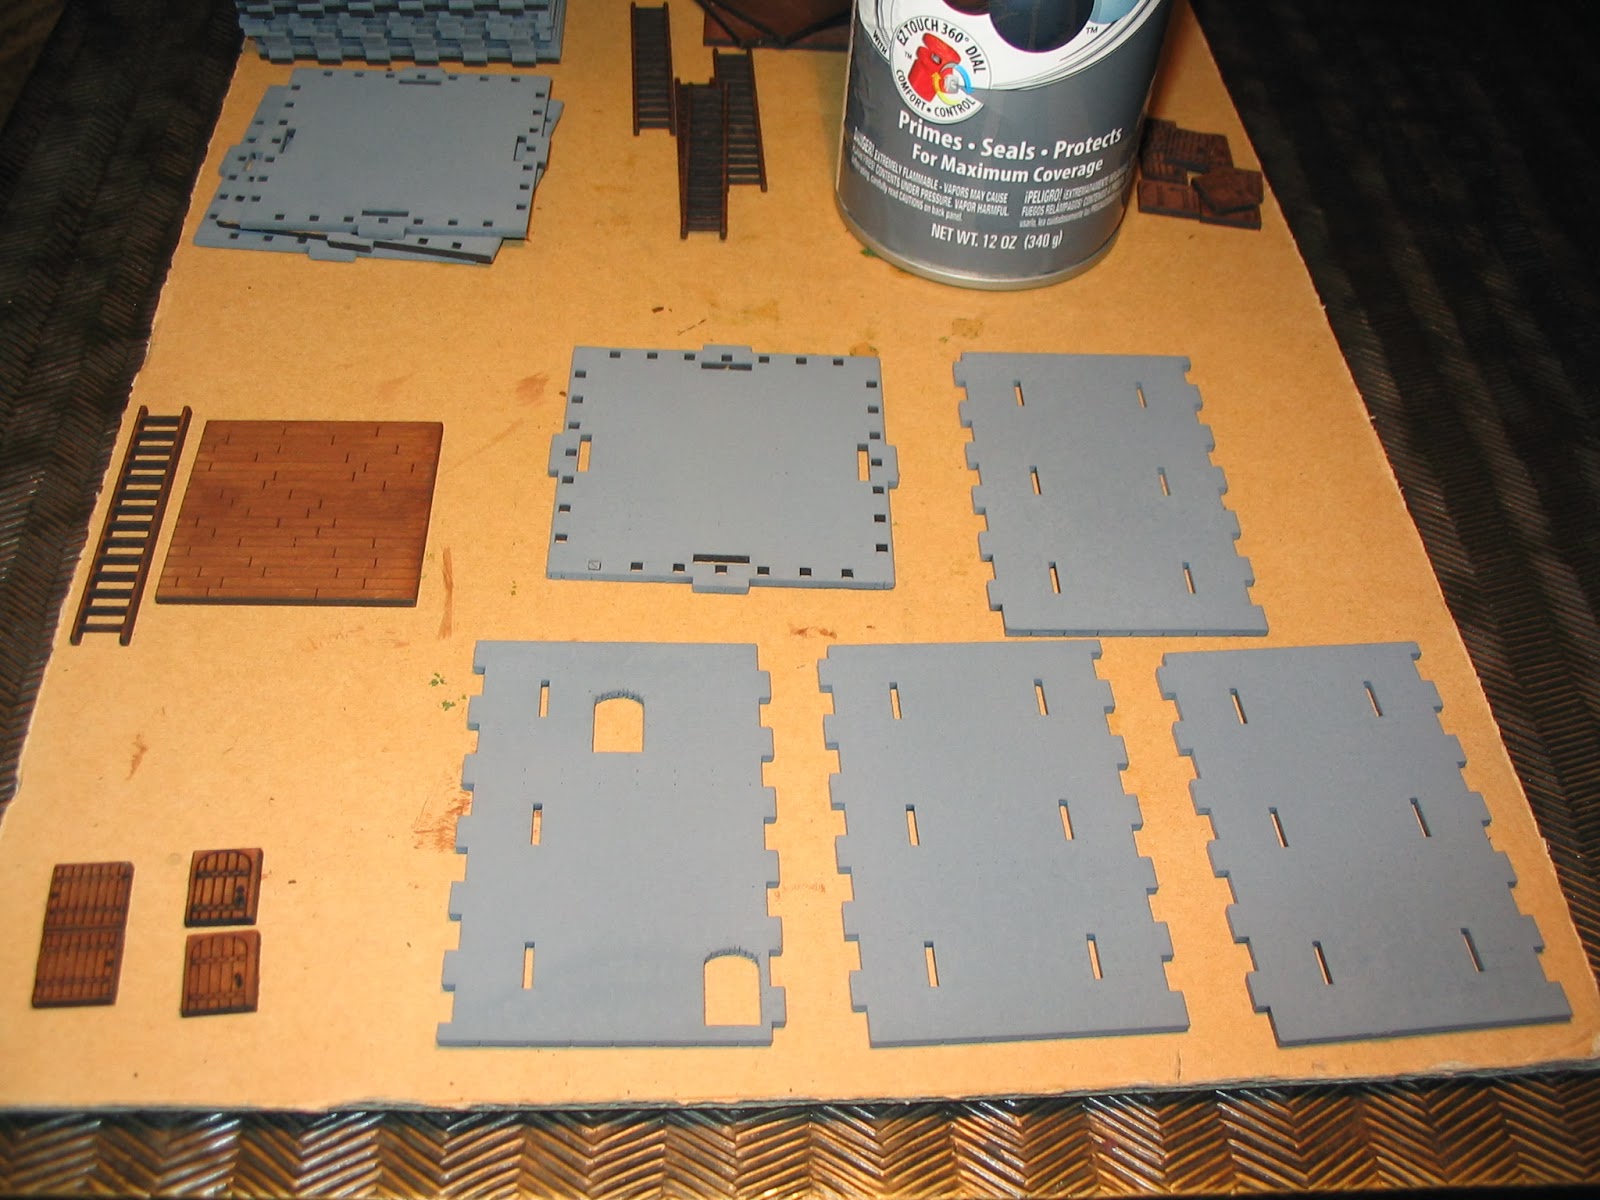
Shown in the picture are the tower parts (and the extra siege ladders— these do not come with the product). These consist of three walls with arrow slits, one wall with door archways, four interior battlement facades, four exterior battlement facades, an interior tower floor (etched to look like wood), a roof/battlement floor (etched to look like assorted stone), four “battlement support” pieces (etched to appear like stone) that hold the battlement section in place, four interior floor supports (unetched), two arched doors (slightly different) and two trap doors (identical). There is also a guide piece used to align the floor supports.

The set does come with instructions, but I will say these are a bit sparse. Still, it’s not hard to determine from the pictures what to do.

Painting the Tower

Although the instructions don’t call for it, since the upper interior of the tower forms a room that is visible when the battlement is removed, I decided to paint the interior parts before assembly. Since I have four towers to build, I primed all four tower sets at the same time. As the floor and doors would also be permanent once installed, I painted them as well, using a slightly thinned acrylic craft paint (Delta Ceramcoat Burnt Umber). Although Burnt Umber is a very dark brown pigment, the paint absorbed partially into the MDF, which ended up producing a “stained wood” effect that I quite liked.

Assembling the Tower

If you look closely at the photo, you might notice that the battlement floor (or tower roof) has a series of small square holes around the edges. These are not construction elements, so I gather they represent drain holes as a real fortress might use for boiling oil! (Or, in more mundane times, rain gutters.) You may notice that one of these is not punched. I had several such elements in my various parts, but found that slight pressure with a small pointed tool popped them out with no fuss (I used a golf tee I had handy).


Walls

The tower walls were quite simple to assemble. I put a bit of white glue (PVA or Elmer’s) on the inside of the notches, and then fit the four walls together. The order of the walls doesn’t matter; they’re essentially interchangeable, and the orientation is obvious; if you find that the walls aren’t meeting equally at the top and bottom, simply turn the wall vertically 180°. Voila— perfect fit.

Note that I used one of the floor pieces as a guide to make certain the walls fit square. This is recommended in the instructions. What isn’t mentioned, and I found helpful, is to wrap the tower in rubber bands (two should do) to act as a “clamp” while the glue dries.

Floor Supports

The problem: A tight fit.
The solution: Rubber bands.
Next I installed the interior floor supports as the instructions stated. This proved trickier than I expected; the fit is very tight on these, and my first effort resulted in the tower springing apart... that’s when I discovered how useful rubber bands could be.

Battlements

Battlements "clamped" for gluing.
Lower support sections added underneath
With the floor supports in place, I proceeded to the battlement and roof assembly. This seems like it might be tricky, but it’s actually fairly simple. The four interior battlements (no notches) all have slots on the bottom that slip onto tabs along the edges of the battlement floor. Note that the stonework side on these faces inward— that’s important. The exterior sides have notches that fit into each other just like the tower walls. These are glued back-to-back to the interior battlements, with the exterior stonework facing out, matching the crenellations to the crenellations on the interior battlement. Line ‘em up, wrap with a rubber band as a clamp, and let dry.

While this is drying, you can also install the under supports. Flip the battlement over. The supports have tabs that fit into slots in the roof. The stonework faces out. Glue and set the whole thing aside to dry. Easy peasy.

The Tower Doors

Before installing the doors or anything else, I recommend painting or priming the exterior of the tower; this protects your “wood” pieces from inadvertently becoming “stone” pieces. (I forgot to remove the interior floor on one of my towers and wound up with “clouds” of gray paint on my new hardwood tower flooring! Man, was I peeved at that contractor... But I sanded it out and repainted the burnt umber. Lesson learned!)

The doors and trap doors are nicely detailed with “bands” intended to be iron straps. So before installing the doors, I also gave these little “studded” strips a quick dab of black acrylic craft paint.

Two different doors: Upper and lower.
This step is where an eye for detail becomes important. The instructions don’t mention this, but there are two types of arched doors— one where the door is etched inside a rectangle of wood with clear wood “margins” all around, and another where the bottom edge of the door is flush with the edge of the wood. This is important, because the latter doors (flush with the edge) are for the upper room of the tower; the flush edge allows the door to sit against the upper room floor. The “margin” doors are for the bottom of the tower. So pay attention when installing these!

Trap doors (What, no elevator?)
The trapdoors can be glued anywhere you like. One goes on the interior floor, the other on the battlement floor. I chose the center for the roof door and the side or corner for the room floor door, but the placement is up to the builder.

Once the doors are on, the battlement simply sits in place atop the tower. Nothing to it!


Below are some pictures of a tower "in action." (These also are better photos of some of my critters from the last post, as promised.)

A lonely tower on the moors, and the beasties that want to claim it!
Smile for your beauty shot, Dain!
Ugly Brutes! (Battle of Five Armies Hill Trolls)
Little Ugly Brutes! (Battle of Five Armies Goblin Guard)
A poor man's Orthanc!
(Even stacked this high, the towers remain very stable.)

THE FORTRESS WALLS

The Wall Parts. Not as complicated as it looks.
Though the walls look complicated, and have some different bits, I found them even easier to build than the towers. The base acts to hold the assembly square (it’s basically a big rectangular box with a facade on one side). This set also didn’t need to be primed before assembly; it’s all stone, and has no exposed interior, so I could glue it completely before painting.

The walls consist of a base (with a cobblestone edge), a short interior wall (no crenellations), a stone roof/battlement walkway, an interior battlement wall (with etched stone crenellations and the rest blank), two side walls, the exterior facade (fully etched, with crenellations), and two “buttresses.” There’s also a long narrow “trim” piece that fits into the exterior facade. I’m not certain what this is intended to be except for a bit of three dimensional detailing. Looks good, anyway.

Assembling the Walls

Walls Assemble! (Basically, add glue, fit, clamp, done.)
As I said, assembly is simple. I glued the two side walls (notches down) to the interior battlement wall (stonework facing inwards) and the interior stone wall (stone work facing away from the battlement wall). Then I glued this to the base, with the cobblestone on the interior side of the wall (it’s the courtyard floor, or at least some of it). As there are specific notches in the base for the various pieces, there’s no other way to assemble it, so you really aren’t likely to make a mistake. Just be certain the side wall has the notch side down.

Once this is in place, glue the exterior facade to the battlement wall, matching the crenellations. Stick on the buttresses, add the trim bit, and wrap with a bunch of rubber bands to dry. Prime later, and you’re done with your castle walls.


THE GATEWAY

The Gatehouse components. Notice the block of hinge parts.
This proved to be the trickiest piece to assemble, and alas, nowhere near as easy as the others. I’ll preface this part by saying that I’m no modeler. I don’t like finicky bits, and I’m not a deft hand at trimming. Unfortunately, this would become an issue.

The Gatehouse Doors

The problem arises with the doors. Sally 4th opted to create a very realistic door design for their gateway, including working full pin hinges and gate bar brackets. I suspect this is a translation from their 28mm scale forces, and at first it seems like a neat feature. In practice, at least for me, it became a headache.

Painting the Doors

The back of the doors.
The front of the doors.
had painted the doors with brown umber for the “wood” and flat black for the bands and the various parts. Though recessed into the gatehouse, the back of the door is visible from the interior, and has no detailing (I gather laser-etching is a one-sided deal, or at least double-sided etching is cost prohibitive). I experimented on an extra guide piece from the tower build to see if I could create straight lines, but abandoned this attempt, and opted to just paint the door burnt umber and hand-painted two black bands to match the etched bands on the front. But that was just painting, and not a source of any difficulty— that would be the “bits.”

The Difficult “Bits”

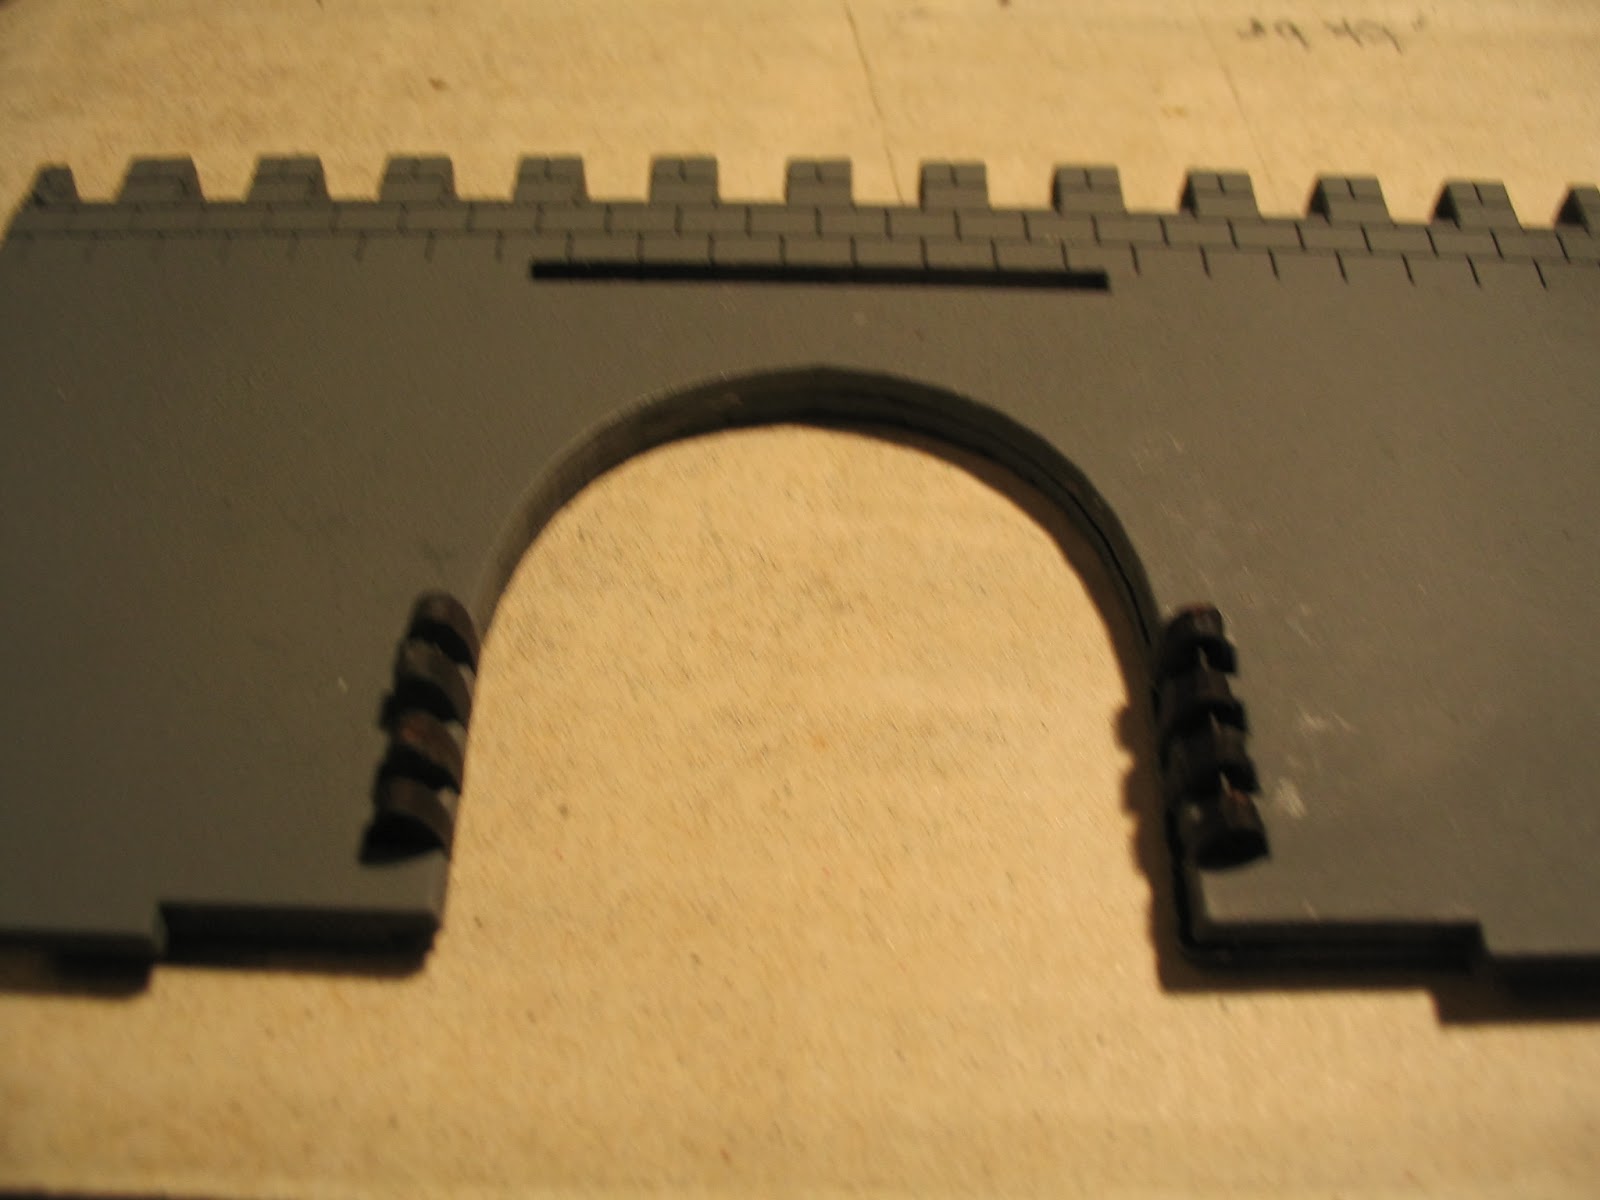
The brackets clamped for repairs and repainting. :-(
I also chose to paint the two front wall halves near the
arches, as I was concerned the bare wood might show later.
The problem lies in the nature of laser-etched MDF. As the pieces for the hinges and the  bar brackets are small, Sally 4th left them intact within a small square of MDF, with instructions to punch them out for assembly. Unfortunately, these pieces didn’t “punch.” I had painted both sides first because it seemed like an easier step than trying to paint each individually. It’s possible that the paint added to my woes, but in any case the hinge parts and the brackets weren’t cut all the way through; I tried trimming with an X-acto blade, but the pieces still split along the plane of the MDF when I tried to remove them from the MDF piece. I had to glue the pieces together, which produced less than stellar results.

It Hinges on the Hinges

The hinges with the pins in place.
Note that they can't be glue into
the walls already pinned.
(I found that out the hard way.)
But you can see how they fit.
(Click on the image to enlarge.)
Later, when it came time to add the hinge pieces to the door, I found that the pieces were thicker than the gaps between the pieces; this meant I had to sand down the hinge parts (ruining my “quick and easy” paint job). Rather than hunt out some sandpaper, I just used a handy fingernail file. Fortunately, the area sanded was the interior of the hinge, which will mostly hidden from view.

The "arch" hinges glued to the wall.
(Click on the image to enlarge.)
The size of the hinges at 10mm scale also proved tricky. Although the set came with four black straight pins (two extra) to act as the hinge pins, lining up the hinge parts for the pin was no easy task. First I had to use the smallest bit of my pin vice to clear the holes intended for the pin (these too had not been cut all the way through). After that, it was trial and error to line up the parts, especially once the arch hinge parts were glued to the gateway wall piece.

(The instructions, by the way, are incorrect about the number of hinge parts. There are 3 “d” hinge parts for each door half, and 4 “arch” hinge parts for each door half.)

Hanging the Doors

The doors "hung" in place.
The doors inside the "archway".
Note how they actually hang back
from the walls. (Click to enlarge.)
I was a little thrown by how the door fits into the gate arch. I had assumed that it would be flush with at least one gate wall, but from what I can tell, it’s meant to hang somewhat suspended in the middle of the gate. That seems a bit odd, and the instructions don’t say one way or the other, but this position is the only way I could see the design working due to the design of the hinges. At least, it’s how I wound up installing the doors. On the tabletop it looks fine— the doors appear to be set back inside the gatehouse, though if you pick up the gatehouse and peer closely, you can see the gap between the wall and the door.

I suspect that part of the problem is that, if you follow the instructions and the photos, you wind up with the hinge pins on the exterior side of the door— that is, the side that would face the enemy! It’s possible that I might have installed these parts incorrectly, though I tried to follow the image included with the instructions.

A Pain in the Brackets

Lastly, I found the bar brackets to be equally as difficult to work with. Like the hinge parts, these also split when removed from the MDF square. I glued and clamped them back together, but then discovered that they’re too large to fit into the intended holes on the door halves. I finally resorted to whittling off the posts to fit and painting them black.

To Beam or Not To Beam

The doors opened as fully as they will go.
Note the bar brackets in place (whew!).
View is from the inside of the gateway.
The set includes a beam to bar the door, which I only realized when I had installed the bar brackets. At first I thought this small piece of wood was merely an extra bit of scrap. But as it is, whether due to the design or the fact that I had to trim the bar brackets to fit them into the doors, and the beam was too wide to slip in the space. I filed and filed away at the fit, certain at any moment I would snap the beam. That didn’t happen, but then I also gave up on creating a strip slim enough to fit the brackets (and still be removed). I might just substitute a flat toothpick instead, if I want to bother with the bar.

Fling the Gates, Uhm, Narrow

After all this work, it turns out that the doors won’t open fully perpendicular to the wall; they strike the inner archway at about 45°. As a result, the gap between the open doors is smaller than the narrow edge of a Warmaster base. Of course, this is not a factor in play (one simply rules that a stand can fit either way in the arch), and not really a big deal in appearance— just don’t expect to “fling the gates wide.”

Assembling the Gatehouse

The rest of the gatehouse assembled very much similar to the walls. Note that the doors need to be built in before the final assembly, and plan accordingly. This means you should paint or prime the interior walls before installing the doors, or you’ll face some interesting painting headaches. Although I had taken this step, I discovered I had failed to paint the long exterior trim piece, and had sprayed the incorrect side of one wall edge after I assembled the piece. But since these were exterior surfaces, I simply masked off the doors and sprayed away.

FINAL THOUGHTS

A fortress, manned (or elved) and ready!
You will see that each tower easily holds an entire Warmaster unit, as do the walls.
Bring on the orc hordes!
The towers and walls are versatile pieces, and very easy to build. The gateway probably has more detail than is really needed with the hinge assembly and the bar brackets, especially given the effort I had to trim, paint and install them. But once it’s all together, the set makes for a great fortress, suitable for fantasy, medieval or even some ancients settings. Historical purists may not like the significant overhang created by the tower battlements, or the small buttress pieces on the walls and gates, but this is not intended to be a replica of any specific building. Rather it is a playable fortress which can support the base width and depth of Warmaster units (as well as other basing systems). For that purpose, I think it is an excellent choice. I would recommend to casual modelers that you consider skipping the intricate hinge work and opt for just gluing the gates in place, or glueing them to a simple base stand (perhaps the guide pieces from the tower) so they can be removed when “opened” or “battered down” during play. I will say, that despite the problems I had with the hingers and brackets, I still very much appreciate the quality of this product. Whatever headaches these caused, it’s still a terrific looking piece, and I’m quite happy with my purchase.

Sally 4th has also just announced a 10mm Norman Keep that will work with this set; it’s on my list (hint, hint).

WHERE TO FIND THE FORTRESS

Sally 4th sells a wide range of laser cut MDF products for 10mm, 15mm and 28mm scales. They can be ordered direct from the UK, but they now have a US distributor through Scale Creep Miniatures. I’ve purchased products from Mark, the owner of Scale Creep, both in person and on line, so I’ll vouch for his excellent service and prompt delivery. Plus, he’s just a great guy. Order with confidence!

Sally 4th's website


--- Parzival