Monday, November 11, 2013

A Home for Warriors: Building the Laser Cut Fortress from Sally 4th

A late wind rises above the fields, carrying with it the sounds of leather slapping against metal, the clop of hooves on stone, and high upon the breeze the sound of one lone horn calling out in greeting, “Open the gates! The lords have returned from battle!”


Forth, Eolingas!


THE PROJECT

Every army needs a home, a place to muster, to train, and to occasionally defend in a desperate fight against overwhelming odds (or to try and assault with the same). While I have praised (and still do) the excellent paper Kragenvale Keep (review here), I also wanted something a bit more generic (and potentially more imposing). So when Sally 4th, a new manufacture based in the United Kingdom, announced a line of laser cut MDF fortresses, I was intrigued. In fact, I suggested on The Miniatures Page that they consider a 10mm line scaled for Warmaster’s 20mm x 40mm bases... and lo and behold, they did just that. When they also tacked on a sale, I couldn’t resist. Carefully leading my lovely spouse to the computer, I pointed at the screen, said “This is my birthday present from you. Click the button.” And she was more than happy to comply.

As I’d promised myself that I would complete other projects before tackling a new one, I set my present aside and waited. Finally, this weekend I put on my construction hat, opened the package, and went to work.


THE FORTRESS

I had opted to create a small fortress consisting of four towers, three wall sections, and a gateway. (Let me take a moment to praise the company. When I first received the shipment, my examination of the contents revealed a few pieces that were damaged in shipping. I sent an e-mail to Sally 4th, and promptly received all the necessary replacement parts and a bonus of 5 little siege ladders.) Not certain how long the process would take, I noted that the towers looked the least complicated, as well as the most versatile (a lone tower is a viable scenario piece, whereas a lone wall or gateway just looks odd). So I decided to begin with this piece.


THE TOWERS

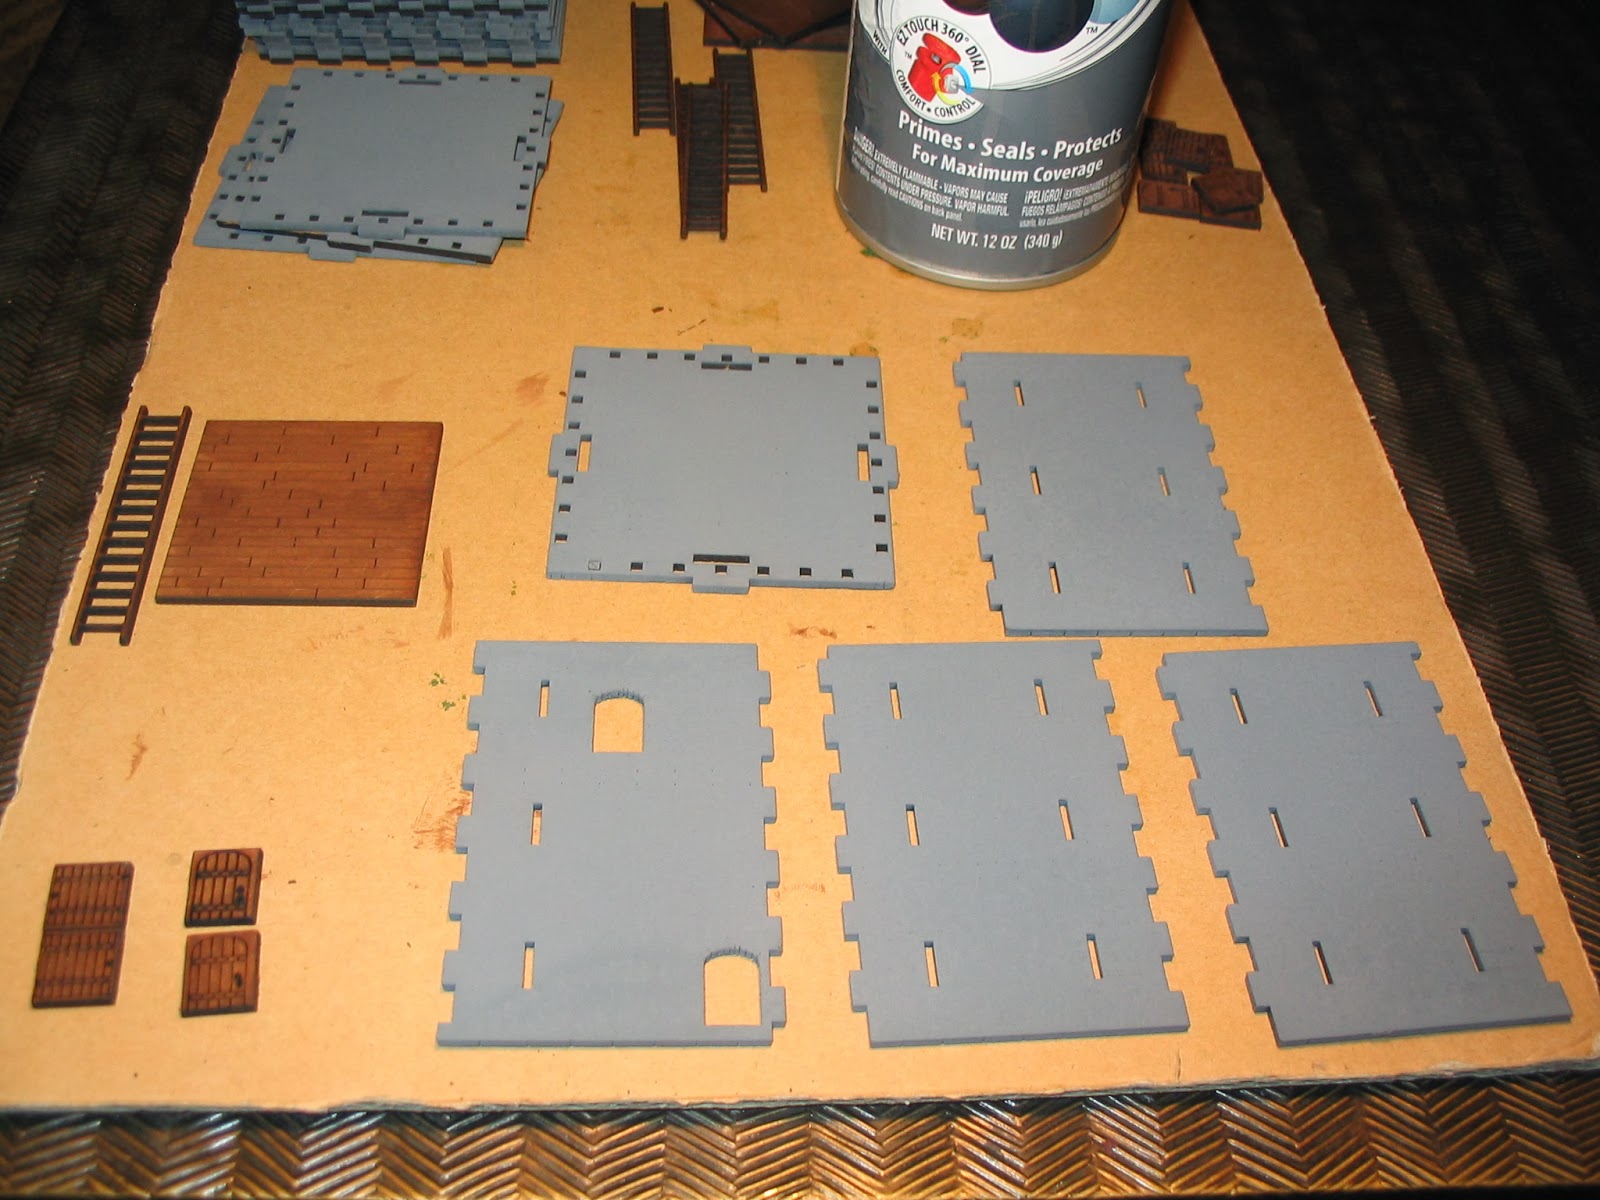
The parts of the tower.
At the bottom of the picture are two broken battlement sections
 as well as the siege ladders Sally 4th sent as a bonus.
Shown in the picture are the tower parts (and the extra siege ladders— these do not come with the product). These consist of three walls with arrow slits, one wall with door archways, four interior battlement facades, four exterior battlement facades, an interior tower floor (etched to look like wood), a roof/battlement floor (etched to look like assorted stone), four “battlement support” pieces (etched to appear like stone) that hold the battlement section in place, four interior floor supports (unetched), two arched doors (slightly different) and two trap doors (identical). There is also a guide piece used to align the floor supports.

The set does come with instructions, but I will say these are a bit sparse. Still, it’s not hard to determine from the pictures what to do.

Painting the Tower

Although the instructions don’t call for it, since the upper interior of the tower forms a room that is visible when the battlement is removed, I decided to paint the interior parts before assembly. Since I have four towers to build, I primed all four tower sets at the same time. As the floor and doors would also be permanent once installed, I painted them as well, using a slightly thinned acrylic craft paint (Delta Ceramcoat Burnt Umber). Although Burnt Umber is a very dark brown pigment, the paint absorbed partially into the MDF, which ended up producing a “stained wood” effect that I quite liked.

Assembling the Tower

If you look closely at the photo, you might notice that the battlement floor (or tower roof) has a series of small square holes around the edges. These are not construction elements, so I gather they represent drain holes as a real fortress might use for boiling oil! (Or, in more mundane times, rain gutters.) You may notice that one of these is not punched. I had several such elements in my various parts, but found that slight pressure with a small pointed tool popped them out with no fuss (I used a golf tee I had handy).


Walls

The tower walls were quite simple to assemble. I put a bit of white glue (PVA or Elmer’s) on the inside of the notches, and then fit the four walls together. The order of the walls doesn’t matter; they’re essentially interchangeable, and the orientation is obvious; if you find that the walls aren’t meeting equally at the top and bottom, simply turn the wall vertically 180°. Voila— perfect fit.

Note that I used one of the floor pieces as a guide to make certain the walls fit square. This is recommended in the instructions. What isn’t mentioned, and I found helpful, is to wrap the tower in rubber bands (two should do) to act as a “clamp” while the glue dries.

Floor Supports

The problem: A tight fit.
The solution: Rubber bands.
Next I installed the interior floor supports as the instructions stated. This proved trickier than I expected; the fit is very tight on these, and my first effort resulted in the tower springing apart... that’s when I discovered how useful rubber bands could be.

Battlements

Battlements "clamped" for gluing.
Lower support sections added underneath
With the floor supports in place, I proceeded to the battlement and roof assembly. This seems like it might be tricky, but it’s actually fairly simple. The four interior battlements (no notches) all have slots on the bottom that slip onto tabs along the edges of the battlement floor. Note that the stonework side on these faces inward— that’s important. The exterior sides have notches that fit into each other just like the tower walls. These are glued back-to-back to the interior battlements, with the exterior stonework facing out, matching the crenellations to the crenellations on the interior battlement. Line ‘em up, wrap with a rubber band as a clamp, and let dry.

While this is drying, you can also install the under supports. Flip the battlement over. The supports have tabs that fit into slots in the roof. The stonework faces out. Glue and set the whole thing aside to dry. Easy peasy.

The Tower Doors

Before installing the doors or anything else, I recommend painting or priming the exterior of the tower; this protects your “wood” pieces from inadvertently becoming “stone” pieces. (I forgot to remove the interior floor on one of my towers and wound up with “clouds” of gray paint on my new hardwood tower flooring! Man, was I peeved at that contractor... But I sanded it out and repainted the burnt umber. Lesson learned!)

The doors and trap doors are nicely detailed with “bands” intended to be iron straps. So before installing the doors, I also gave these little “studded” strips a quick dab of black acrylic craft paint.

Two different doors: Upper and lower.
This step is where an eye for detail becomes important. The instructions don’t mention this, but there are two types of arched doors— one where the door is etched inside a rectangle of wood with clear wood “margins” all around, and another where the bottom edge of the door is flush with the edge of the wood. This is important, because the latter doors (flush with the edge) are for the upper room of the tower; the flush edge allows the door to sit against the upper room floor. The “margin” doors are for the bottom of the tower. So pay attention when installing these!

Trap doors (What, no elevator?)
The trapdoors can be glued anywhere you like. One goes on the interior floor, the other on the battlement floor. I chose the center for the roof door and the side or corner for the room floor door, but the placement is up to the builder.

Once the doors are on, the battlement simply sits in place atop the tower. Nothing to it!


Below are some pictures of a tower "in action." (These also are better photos of some of my critters from the last post, as promised.)

A lonely tower on the moors, and the beasties that want to claim it!
Smile for your beauty shot, Dain!
Ugly Brutes! (Battle of Five Armies Hill Trolls)
Little Ugly Brutes! (Battle of Five Armies Goblin Guard)
A poor man's Orthanc!
(Even stacked this high, the towers remain very stable.)

THE FORTRESS WALLS

The Wall Parts. Not as complicated as it looks.
Though the walls look complicated, and have some different bits, I found them even easier to build than the towers. The base acts to hold the assembly square (it’s basically a big rectangular box with a facade on one side). This set also didn’t need to be primed before assembly; it’s all stone, and has no exposed interior, so I could glue it completely before painting.

The walls consist of a base (with a cobblestone edge), a short interior wall (no crenellations), a stone roof/battlement walkway, an interior battlement wall (with etched stone crenellations and the rest blank), two side walls, the exterior facade (fully etched, with crenellations), and two “buttresses.” There’s also a long narrow “trim” piece that fits into the exterior facade. I’m not certain what this is intended to be except for a bit of three dimensional detailing. Looks good, anyway.

Assembling the Walls

Walls Assemble! (Basically, add glue, fit, clamp, done.)
As I said, assembly is simple. I glued the two side walls (notches down) to the interior battlement wall (stonework facing inwards) and the interior stone wall (stone work facing away from the battlement wall). Then I glued this to the base, with the cobblestone on the interior side of the wall (it’s the courtyard floor, or at least some of it). As there are specific notches in the base for the various pieces, there’s no other way to assemble it, so you really aren’t likely to make a mistake. Just be certain the side wall has the notch side down.

Once this is in place, glue the exterior facade to the battlement wall, matching the crenellations. Stick on the buttresses, add the trim bit, and wrap with a bunch of rubber bands to dry. Prime later, and you’re done with your castle walls.


THE GATEWAY

The Gatehouse components. Notice the block of hinge parts.
This proved to be the trickiest piece to assemble, and alas, nowhere near as easy as the others. I’ll preface this part by saying that I’m no modeler. I don’t like finicky bits, and I’m not a deft hand at trimming. Unfortunately, this would become an issue.

The Gatehouse Doors

The problem arises with the doors. Sally 4th opted to create a very realistic door design for their gateway, including working full pin hinges and gate bar brackets. I suspect this is a translation from their 28mm scale forces, and at first it seems like a neat feature. In practice, at least for me, it became a headache.

Painting the Doors

The back of the doors.
The front of the doors.
I had painted the doors with brown umber for the “wood” and flat black for the bands and the various parts. Though recessed into the gatehouse, the back of the door is visible from the interior, and has no detailing (I gather laser-etching is a one-sided deal, or at least double-sided etching is cost prohibitive). I experimented on an extra guide piece from the tower build to see if I could create straight lines, but abandoned this attempt, and opted to just paint the door burnt umber and hand-painted two black bands to match the etched bands on the front. But that was just painting, and not a source of any difficulty— that would be the “bits.”

The Difficult “Bits”

The brackets clamped for repairs and repainting. :-(
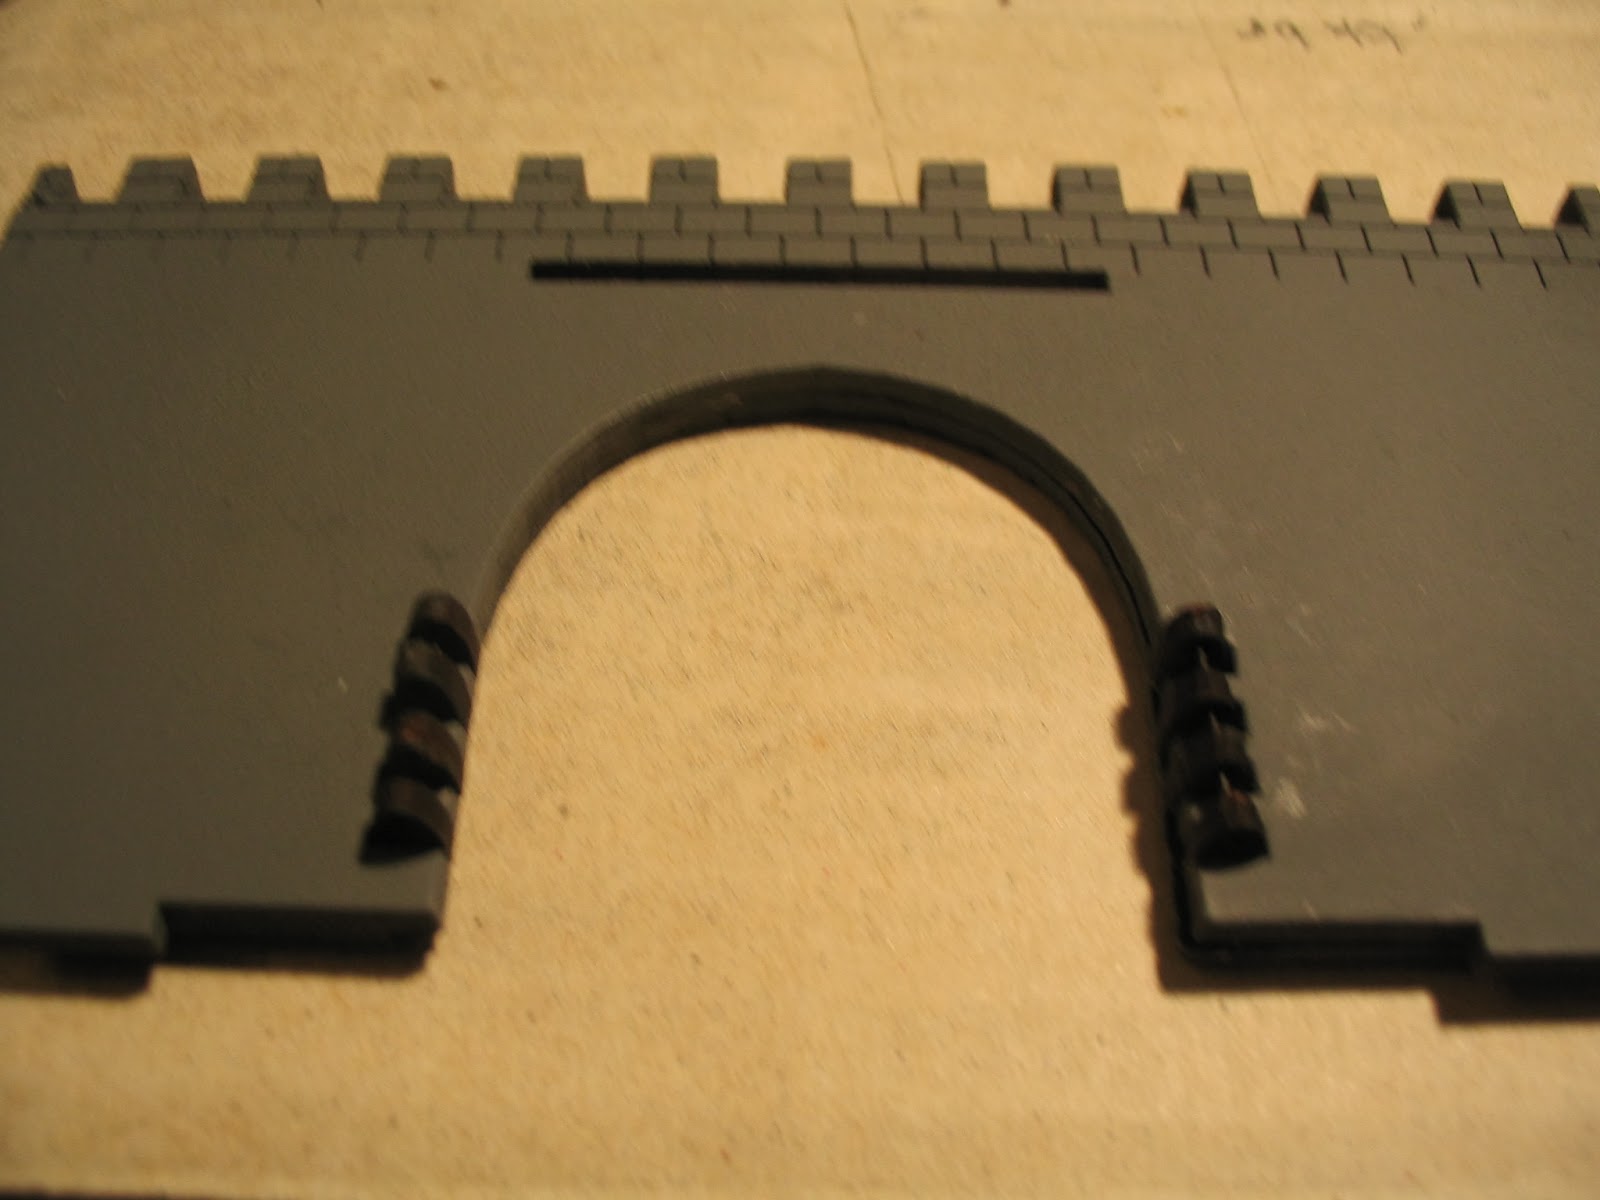
I also chose to paint the two front wall halves near the
arches, as I was concerned the bare wood might show later.
The problem lies in the nature of laser-etched MDF. As the pieces for the hinges and the  bar brackets are small, Sally 4th left them intact within a small square of MDF, with instructions to punch them out for assembly. Unfortunately, these pieces didn’t “punch.” I had painted both sides first because it seemed like an easier step than trying to paint each individually. It’s possible that the paint added to my woes, but in any case the hinge parts and the brackets weren’t cut all the way through; I tried trimming with an X-acto blade, but the pieces still split along the plane of the MDF when I tried to remove them from the MDF piece. I had to glue the pieces together, which produced less than stellar results.

It Hinges on the Hinges

The hinges with the pins in place.
Note that they can't be glue into
the walls already pinned.
(I found that out the hard way.)
But you can see how they fit.
(Click on the image to enlarge.)
Later, when it came time to add the hinge pieces to the door, I found that the pieces were thicker than the gaps between the pieces; this meant I had to sand down the hinge parts (ruining my “quick and easy” paint job). Rather than hunt out some sandpaper, I just used a handy fingernail file. Fortunately, the area sanded was the interior of the hinge, which will mostly hidden from view.

The "arch" hinges glued to the wall.
(Click on the image to enlarge.)
The size of the hinges at 10mm scale also proved tricky. Although the set came with four black straight pins (two extra) to act as the hinge pins, lining up the hinge parts for the pin was no easy task. First I had to use the smallest bit of my pin vice to clear the holes intended for the pin (these too had not been cut all the way through). After that, it was trial and error to line up the parts, especially once the arch hinge parts were glued to the gateway wall piece.

(The instructions, by the way, are incorrect about the number of hinge parts. There are 3 “d” hinge parts for each door half, and 4 “arch” hinge parts for each door half.)

Hanging the Doors

The doors "hung" in place.
The doors inside the "archway".
Note how they actually hang back
from the walls. (Click to enlarge.)
I was a little thrown by how the door fits into the gate arch. I had assumed that it would be flush with at least one gate wall, but from what I can tell, it’s meant to hang somewhat suspended in the middle of the gate. That seems a bit odd, and the instructions don’t say one way or the other, but this position is the only way I could see the design working due to the design of the hinges. At least, it’s how I wound up installing the doors. On the tabletop it looks fine— the doors appear to be set back inside the gatehouse, though if you pick up the gatehouse and peer closely, you can see the gap between the wall and the door.

I suspect that part of the problem is that, if you follow the instructions and the photos, you wind up with the hinge pins on the exterior side of the door— that is, the side that would face the enemy! It’s possible that I might have installed these parts incorrectly, though I tried to follow the image included with the instructions.

A Pain in the Brackets

Lastly, I found the bar brackets to be equally as difficult to work with. Like the hinge parts, these also split when removed from the MDF square. I glued and clamped them back together, but then discovered that they’re too large to fit into the intended holes on the door halves. I finally resorted to whittling off the posts to fit and painting them black.

To Beam or Not To Beam

The doors opened as fully as they will go.
Note the bar brackets in place (whew!).
View is from the inside of the gateway.
The set includes a beam to bar the door, which I only realized when I had installed the bar brackets. At first I thought this small piece of wood was merely an extra bit of scrap. But as it is, whether due to the design or the fact that I had to trim the bar brackets to fit them into the doors, and the beam was too wide to slip in the space. I filed and filed away at the fit, certain at any moment I would snap the beam. That didn’t happen, but then I also gave up on creating a strip slim enough to fit the brackets (and still be removed). I might just substitute a flat toothpick instead, if I want to bother with the bar.

Fling the Gates, Uhm, Narrow

After all this work, it turns out that the doors won’t open fully perpendicular to the wall; they strike the inner archway at about 45°. As a result, the gap between the open doors is smaller than the narrow edge of a Warmaster base. Of course, this is not a factor in play (one simply rules that a stand can fit either way in the arch), and not really a big deal in appearance— just don’t expect to “fling the gates wide.”

Assembling the Gatehouse

The rest of the gatehouse assembled very much similar to the walls. Note that the doors need to be built in before the final assembly, and plan accordingly. This means you should paint or prime the interior walls before installing the doors, or you’ll face some interesting painting headaches. Although I had taken this step, I discovered I had failed to paint the long exterior trim piece, and had sprayed the incorrect side of one wall edge after I assembled the piece. But since these were exterior surfaces, I simply masked off the doors and sprayed away.

FINAL THOUGHTS

A fortress, manned (or elved) and ready!
You will see that each tower easily holds an entire Warmaster unit, as do the walls.
Bring on the orc hordes!
The towers and walls are versatile pieces, and very easy to build. The gateway probably has more detail than is really needed with the hinge assembly and the bar brackets, especially given the effort I had to trim, paint and install them. But once it’s all together, the set makes for a great fortress, suitable for fantasy, medieval or even some ancients settings. Historical purists may not like the significant overhang created by the tower battlements, or the small buttress pieces on the walls and gates, but this is not intended to be a replica of any specific building. Rather it is a playable fortress which can support the base width and depth of Warmaster units (as well as other basing systems). For that purpose, I think it is an excellent choice. I would recommend to casual modelers that you consider skipping the intricate hinge work and opt for just gluing the gates in place, or glueing them to a simple base stand (perhaps the guide pieces from the tower) so they can be removed when “opened” or “battered down” during play. I will say, that despite the problems I had with the hingers and brackets, I still very much appreciate the quality of this product. Whatever headaches these caused, it’s still a terrific looking piece, and I’m quite happy with my purchase.

Sally 4th has also just announced a 10mm Norman Keep that will work with this set; it’s on my list (hint, hint).

WHERE TO FIND THE FORTRESS

Sally 4th sells a wide range of laser cut MDF products for 10mm, 15mm and 28mm scales. They can be ordered direct from the UK, but they now have a US distributor through Scale Creep Miniatures. I’ve purchased products from Mark, the owner of Scale Creep, both in person and on line, so I’ll vouch for his excellent service and prompt delivery. Plus, he’s just a great guy. Order with confidence!

Sally 4th's website


--- Parzival

Wednesday, October 30, 2013

Little Miniatures, Big Project...


The (Big) Battle of Five Armies

The dragon Smaug is dead. Beneath the dead halls of his mountain lies a treasure hoard of wealth uncounted, a vast array of gold and gems and dragon plunder unmatched since the breaking of the world. And where gold lies unprotected, it cries out to all, the greedy and the generous, Come and claim me, and keep me from all others—the cry of the dragon's heart.

And come they have. Elves, men, dwarves, each with claims, each with hopes of doing good (as they each see it) with the wealth within the ancient dwarven halls. But others hear the call as well, with no pretense of good upon their hearts— only greed, cruelty and malice. From the dark deepness of mountainous caverns, from the vile dungeons of twisted mines they come; the goblins of the Misty Mountains, the evil wargs of the forest slopes, and the vicious orcs of Mount Gundabad, all descending upon Erebor, with carrion bats in clouds above their heads...

This is the Battle of the Five Armies— Elves, Men, Dwarves, Goblins and one other (which I shall not spoil, for those not familiar with the tale). The alliance of the free folk is filled with mighty warriors, but few in number, though ably led. The hordes of Gundabad are many, and their lust for battle great. Who will triumph upon the slopes of Erebor? Who will win the hoard below its walls?
A Big Honkin' Battle (with tiny little soldiers)

THE PROJECT

A few years ago, Games Workshop released a boxed game set titled The Battle of Five Armies, based on the climatic fight in J.R.R. Tolkien's children's novel, The Hobbit. (Why they left out the "the" in the name of the battle, I don't know.) The set included plastic miniatures in the growing 10mm scale, as well as two mountain spurs, printed cardboard rivers, and tiny ruined walls to represent the abandoned town of Dale that once thrived in the mountain's shadow in the years before the dragon. I bought that set and (gradually) painted all the parts. I've played the battle many times, but I always wanted to make it even bigger. So a couple of years ago, I was able to arrange a trade for another copy of the game (which is sadly out of production), as well as some companion metal miniatures for extra forces (also out of production). And I've been slowly painting these (very, very slowly) ever since. This weekend, I finally completed my task (football season speeds it up; I paint while the various games are on). The photos you see here are the result.

THE GOOD ARMY (The Free Folk of Middle-Earth)


The Good Army
Top of Hill: Eagles, Thorin Beorn
Back Row: Dain Ironfoot, Dwarves, Lakemen (archers & spears), Bard
Gandalf and Bilbo in foreground
Front Row: Elf Cavalry (Elf King in foreground), Elf archers, Elf Spearmen
Extreme Right: Ents, Rohan Cavalry

Ents (Eureka Miniatures' "Wood Trolls")
Riders of Rohan (from Copplestone Castings' "Horse Tribe")
Also known as "Not Appearing in this Battle"

Closer shot of the main forces from the battle. 
Dain is looking the other way! Oops! Well, at least it's a nice cloak.
The Elf Cavalry also isn't in the book, but was released as a booster force by GW.
Unfortunately, they're not the world's best molds, and the spear heads are flimsy
(two broke off during painting, and are too small to glue back on. I tried).

THE EVIL ARMY

The Evil Army
Top of Hill: Smaug, Giant Bats (Splintered Light Miniatures 15mm Bat Swarms)
Back Row: Orc Chieftain, Goblin Shaman, A horde of goblins, another Chieftain
Wings: Left- Wargs (wolves), Right- Warg Riders (goblin wolf cavalry)
Foreground: Left- Hill Trolls, Right- Goblin Guard.
Center- Bolg.
Two more Chieftains are also milling about.

Closer view of Goblin Guard and Warg Riders

Hill Trolls and Wargs (note Goblin Shaman on rock).
The Trolls are fuzzy, so I'll try to make a better picture...

Closer view of Smaug and Bats. The latter look great and are quick to paint
(spray black, dry brush grey), but each bat has to be glued in place...
and there are a *lot* of bats in a swarm...

THE FORCES IN ACTION

The Valley of the Great Gate


According to the novel, the battle takes place between two spurs of the mountain, in the valley of Dale that lies beneath the Great Gate of Erebor, the ancient home of the King Under the Mountain and one-time dwelling of the unlamented Smaug. The River Running cuts through this valley, dividing it in half. In the scenario with the game, the river is impassable except at a ford back within the valley, above the ruins of Dale. The river springs from an impassable small lake, created by Thorin and Company as a defense for the gate. (Note the crude stone wall between the lake and the western spur; this is Thorin's Wall in the game. If you look carefully, you might be able to detect Thorin behind it...)

The battle begins with the alliance of Free Folk arrayed on the two mountain spurs as described in the book— the elves of Mirkwood on the western spur (the left side of the photos) and the men of Laketown (well, now just "Lake") and the dwarves of the Iron Hills on the eastern spur (the right side).

The goblin horde must enter piecemeal. The game begins with the goblin cavalry (wolves, or "wargs," and warg riders) approaching on the eastern side of the River Running. Only after that turn may the goblin infantry begin to appear; though I have them arrayed on the table for easy set up, the forces are not in the battle, being subject to a die roll each turn to see how many may enter. This is a key strategic and tactical consideration for both sides, as will be seen.

Because I chose to use both boxed sets to create the spurs, they are longer than the scenario calls for; this produced a pronounced narrowing of the battlefield on the eastern edge, which would hamper the cavalry movement; it also placed the western spur significantly closer to the ruins of Dale than the scenario map in the book suggests.  However, as I've never had the ruins amount to much strategically in previous plays, I thought this latter situation an interesting complication to the game.

The Howls of the Vanguard

The vanguard charges; first blood!
The cavalry being heavily bottled up on the goblin right, I wanted to break through the Free Folk line to get to the ford. I hoped the massed array would do the job, despite the heavy infantry line ahead. Alas for Bolg, it was not to be. As is not unusual for a goblin horde, their chieftains got off very few orders— in fact, out of all three chieftains, only one successfully issued one order— sending a lone warg rider unit smashing into the line of the Lakemen. The rest apparently decided to clean the wolves' toenails prior to battle. Grrrr. The whole exchange didn't amount to much, but first blood went to the Lakemen.


Tralala-lolly, There Are Elves In the Valley

The Elves bridge the valley;
the shaman threatens the Elf right.
The elves then decided to advance off the spur, to create a thin line of elves stretching across the valley. The cavalry advanced to monitor the ford, as did some of Dain's dwarves. The Lakemen chose to advance against the warg riders, and wound up sending them back into their line in confusion.


Well, That Wasn't In the Book...

The Lakemen fall, but
the Dwarves hold the line.
From here the battle proceeded with mixed results for both sides. The east became a bloody bottleneck, with both sides trading losses and little or no movement forward or backward. Bard the Bowman, acting to boost the attack capability of his Lakemen wound up being slain very early— a tragic and potentially dangerous loss for the Free Folk.


The Elves Squeeze A Shaman

The Elves roll really, really, really well.
(And the shaman goes "squish.")
Meanwhile, in the center, a goblin shaman entered with a small contingent of goblin infantry, and decided to press the attack. He had initial success, and cast what would be the only successful spell of the game (a "Command" to a recalcitrant unit, spurring it into an elf spearmen flank). But the elf counterattack butchered his small command, and with nowhere to retreat to, the shaman also fell to their spears.

Gandalf took charge in the center, sending elven archers to hold the ruins of Dale and harass the enemy across the river, as well as the new goblin line that appeared (but failed to move) in the south. At this point the elf cavalry apparently threw a shoe, and for want of a nail, did nothing the rest of the game.


A Bolg Too Far...

What happened to all my goblins? And there's a bear!
(Where? Over there!)
I decided to bring up some heavy hitters. My goblin "entry" rolls were horrible, and while I had planned to introduce ordinary (read "militarily pathetic") goblin infantry and hold the heavier troops in reserve, I opted instead to place my Goblin Guard, which has equivalent combat skill to the elves (with one important exception), and attached my general, Bolg of the North, to it for added combat power. I wanted to roll up the elven left and pave the way for my hordes to claim the western side of the valley.


When You Stick Your Neck Out, the Elves Become Your Guillotine

Bolg falls.

I heard an inner voice saying, "Don't do unsupported attacks! Don't do unsupported attacks!" As any good goblin would, I ignored it. And Oh! The carnage I waged upon the elves! They fell before my cleavers like pointy-eared corn before a scythe... but the guard fell as well. Too late Bolg realized the danger and fell back... But Gandalf, seeing the goblin general caught far from any support, ordered the elves after him— and Bolg fell, and with his fall ended the terror of battle. The few goblins remaining fled the field; those reinforcements yet to arrive beheld their allies break, and scattered as well. The battle was done, and the Free Folk were victorious.

WRAP UP

This one lasted only four turns, largely because I failed to be prudent in my use of Bolg and his guard. Waiting for more forces would have been the better choice, slow in coming though they were.
The No-Shows
Thanks a lot, guys.

However, though the above lost the game, other elements contributed:

1.) The narrow eastern shore. With the cavalry doubled, the side was too narrow for most of the wargs and riders to do anything at all but try and move aside whenever their compatriots were forced back.

2.) The doubled defenders. The ability of the elves to all but stretch across the entire valley created a defensible position which offered the attackers little options for maneuvering other than "straight at 'em, boys." Still, the line was thin, and could be broken, and was... just not enough. The same situation held true for the dwarf/men alliance. A single boxed-set's worth of forces faces great challenges in effectively defending the ford, or preventing the cavalry onslaught from getting through. So for two boxes, more land space is needed.

3.) The entry restrictions on Bolg's forces are too much for the amount of troops he has with two sets. In the called-for scenario, he gains advantages when all his forces arrive. But with a maximum of six units entering per turn, and over sixteen infantry units to bring onto the field, Bolg isn't likely to achieve that goal. Clearly for a big battle, the potential entry number needs to rise (possibly use a d8 for that instead of a d6?).

It's possible that none of the above really needs to be changed. Or perhaps Bolg's changing entry rules (and maybe only a partial initial cavalry deployment on the east) would solve the problems.

Either way, it was fun to get my forces on the field. Now, on to the next project... why, yes, there's always another project. Didn't you know?

Signed,

Parzival, the Wargamesmonger

Sunday, August 25, 2013

The Search for Solo— An X-wing Report

Episode V and a .V

The Search for Solo

Following the disaster at Bespin, Lando Calrissian and Chewbacca are searching for Han Solo and his captor, the bounty hunter Boba Fett. Rebel intelligence report no word of either Fett or Solo on Tatooine, the obvious destination— but then, where are they?

Bribing his underworld connections, Lando learns that Fett's ship has been sighted near the Anootla asteroid cluster.

The Alliance Command issue order— disable the Slave 1 and scan her for Captain Solo's presence— or at least clues to his whereabouts.

Within hours, Lando and a small fleet jump for Anootla... but are they headed to a rescue, or something else?

Back to a Galaxy Far, Far Away

(or at least a thirty-minute drive at rush hour).

Once again my gaming buddies and I converged for an evening of X-Wing, which appears to have become our current obsession. (We do play other games— honest!) On the evening in question, our location of choice was Will's domicile— Commodore Will, for the purposes of this evening's game (and the starting college football season— Go Vandy!).

The story— an original scenario featuring the Firespray-31 "patrol and attack craft," better known as Slave 1, Boba Fett's personal ship from Episode V The Empire Strikes Back.

Although I don't own this ship myself (yet), Will had brought it to one of our earlier games, and I thought it would be good to try it out in a balanced scenario, with a theme appropriate to the devious, self-serving bounty hunter.
The Forces of Good and Better Than Good, holding their secret orders.
Rebels, L t R: Lieutenant Chase, Commodore Will, Commander Jim
Empire, L t R: Darth Alexander, Darth Michael (as Colonel Soontir Fel)

I decided to go all out with this one, giving each side "mission dossiers"with their goals and battle intelligence. And yes, this meant that both sides weren't fully informed as to the other's objectives or capabilities. I knew, of course, which is why I operated the Slave 1. Its role wasn't particularly secret to either side, so I could play without having any unfair advantage. Command of the Empire forces was thus left to Darth Michael, with my son Darth Alexander fulfilling the role of eager young officer... who got his command thoroughly shot up over the course of the evening. (So he fulfilled his role well.)

The Battle Begins

The Rebels arrive...
... and the forces advance.
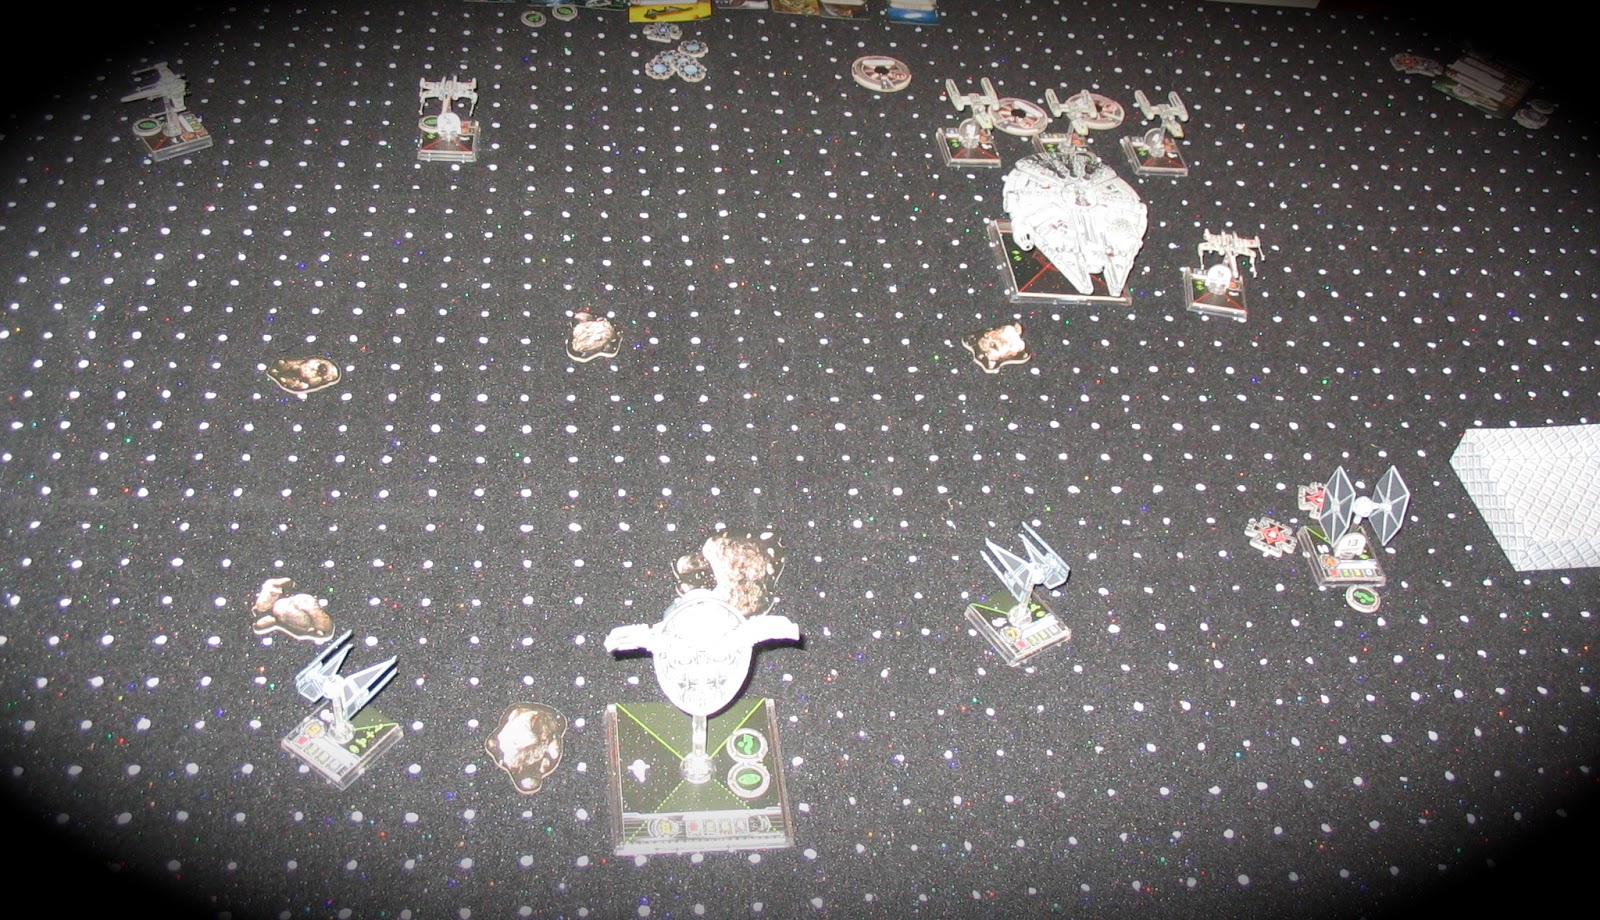
The scene opens on the Anootla system, near a prominent asteroid cluster, as the Rebel forces approach Slave 1 and her suspiciously small escort. Yes, they had two of the fast and dangerous TIE Interceptors, but the Rebel commanders were not blind to the apparent weakness of the foe.

Starting forces:

Rebel Alliance:
Millenium Falcon, piloted by Lando Calrissian (Commodore Will).
 3 X-wings: Luke Skywalker, a Red Squadron pilot, and a rookie (Lieutenant Chase, rebellious son of Darth Michael)
3 Y-wings with ion cannon turrets: "Dutch" Vander and two Gold Squadron veterans (Commander Jim)

Empire:
TIE Interceptor: Soontir Fel (Darth Michael)
TIE Interceptor: Turr Fennir (Darth Alexander)
TIE fighter: Black Squadron (Darth Alexander)
Slave 1, piloted by Boba Fett (yours truly)

Yeah, you can do the math, too, right?

First Moves to First Blood

Darth Alexander loses his first wingman on the first turn!
Things got off with a bang— specifically, the silent "bang" created when a TIE fighter turns into so much cosmic vapor. The first TIE got fragged without firing a shot! The Rebels were celebrating an early sighting of victory as they reached the asteroid field...

Guess What...


Okay, yeah, everybody saw this coming. But it was still fun.

The Rebel commanders observe the tactical situation with dismay:
"Where'd all those TIE fighters come from?"
"I told you it was a trap."

Revised Empire Forces:

2 TIE Interceptors: Soontir Fel, Fel's Wrath
3 TIE Fighters: Howlgunner, Night Beast, Black Squadron Pilot (all Darth Michael)
1 TIE Interceptor: Turr Fennir
3 TIE Fighters (+1 already destroyed): Backstabber, Mauler Mithel, Dark Curse (all Darth Alexander)
Slave 1 (still me)

[Note on both sides, upgrades, secondary weapons, etc., were all fully utilized; the total points were close to 260 for each side.]

The terms of the scenario allowed the Empire to announce the added forces after the plotting phase, any time before the Rebels entered or passed the asteroid field; this turned out to be Turn 2. This allowed the new TIEs to be placed and plot their movements.

Demolition Derby

A Big Hairy Furball... and Lando just had the Falcon waxed.
The sudden arrival of new ships messed with everyone's plotting— almost every ship found itself colliding with either another ship or an asteroid or both. (Slave 1 passed through the field and the furball unscathed, thanks to someone's amazing piloting skills. *Ahem.*)
Boom...
...Boom...
...Boom... and the Y-wings close in.

Despite the confusion, most fighters had a targets, and the close range blasting took out shields and ships left and right. Darth Alexander's forces took the brunt of the attacks; by Turn 4, he was down to two ships, with all but one of his damaged, while Darth Michael was largely unscathed. Yours Truly lost a few shields, as did the Rebels, but they looked to be sitting pretty, and set off in pursuit of Slave 1, with ion cannons primed for action. Seeking to throw the Ys offtrack, I deployed a proximity mine. It didn't work (well, not as intended), but we did manage to blast a Y-wing off my tail— the first Empire kill of the night!

Commander Jim does not look happy. I can't imagine Y...
But they got some payback immediately.
Hey, he's gonna shoot you, too...


... another TIE bites the dust.
The bright spot for the Empire forces came with the destruction of Luke Skywalker, after a brutal team-up by Darth Michael's and Darth Alexander's commands.
No, lieutenant. There is nothing that will save you now.

But the Empire was still taking losses, and the remaining Y-wings were catching up to Slave 1.
And another one's gone...

Yours, Mine and Ours

Commander Jim proved to be too skilled a pilot for my deadly traffic cone... unfortunately, Darth Michael did not— my very own ally flew into the mine, barely surviving with a hit and a critical hit!
Darth Michael makes a wrong turn... "click— BOOM!"
Our trap seemed to be falling apart, and we were turning into our own worst enemies...

Turning the Tables


Boba Fett fights back... scratch another Y-wing!
I'd been doing "scoot and shoot" maneuvers with the Slave 1, relying largely on the aft firing arc for potshots at the Y-wings and the Falcon. But I needed heavier efforts, especially as I now bore four target locks on me and my shields were gone. I flipped the ship to bring my hunters into my foreword arc for use of my powerful secondary weapons— a heavy laser cannon and an assault missile. It was a good thing I did so, as Jim hit me with two ion blasts in succession, leaving me unable to maneuver for a turn. But my heavy weapons were now aimed at the hounds, and the hunters became the hunted. The remaining TIEs closed in as well. The Falcon drew fire to protect the crucial Y-wings, but all were now in trouble, and the Falcon, out of shields, was taking hull hits. My blasts took out a second Y-wing, which all but assured victory for the Empire.

Y Becomes the Final Letter in the Alphabet

The final shot came down to Darth Michael. At this point, all but three of the TIEs had been destroyed, and the remainder were not likely to survive much longer. But on Turn 7, Michael lined up a long range shot on the sole remaining Y-wing... and blew her out of the asteroid cluster.
Y did we shoot you? Because we could!

Now unable to fulfill their mission objectives (get four ion counters on the Slave 1 in one turn), the Rebels abandoned the field. Lando would have to travel to Tatooine to find his frozen friend...

Well, That's a Wrap.

All in all, the evening was a success. We had a great time, and the scenario made for a fun mix of vessels and tactical options. It's hard to say after one play whether all the objectives worked. Jim had concerns that the Rebel task— score 6 ion hits on the Slave 1 in a single turn— was too unlikely with only three Y-wings. He's probably right, but as the Ys took a long time to catch up to the Slave 1, and took hits along the way, they never managed to get into a coordinated range for an attempt. In retrospect, I think reducing the goal makes sense, as well as allowing at least one of the hits to be a "carryover" from a previous combat round (per the large ship rules regarding ion hits). I also think a fourth Y in place of an X-wing is a good call as well.

The "It's a Trap" moment was a hit. Jim confirmed they suspected reinforcements would arrive... but not in the middle of the asteroid field, which caught them by surprise. I think they had also planned their entry around an attempt to eliminate the escort and then pursue the Slave 1. In retrospect, the Ys probably should have started from the center of their battlefield edge, not their left, and gone for the Slave 1 from the start.

The Empire objective worked well, and given the losses they took remained in doubt till the end of the game.

As Boba Fett, I found myself questioning my presence on the battlefield. As bait, it became clear to me that Fett needed other motivation to hang around besides just luring Y-wings into a death trap. Yeah, group effort, take one for the team, blah, blah blah— he's a self-serving bounty hunter, not a professional decoy! So I may tweak that a bit, especially as I like the idea of a three-way objective split. (Heh, heh, heh.)

And I'm going to eat my words regarding the Firespray-31 spaceship. I had said I wasn't interested, as I never really cared for the design (like somebody stuck a Viper onto a computer mouse and stood it on its nose...), and also because the Slave 1 never engaged in combat in the original films. (We shall not speak of the "prequels," which Do Not Exist in my Star Wars universe). But FFG have turned the Firespray into a must-have vessel, with unique tactical elements and abilities. I like the fore/aft firing arcs, and the ability to drop mines and bombs. It was a lot of fun to "fly" the Firespray and plot my targeting arcs. And when my own ally flew into the mine... getting to razz Michael about his piloting skills— well, that's just gaming gold! (Seriously, he had to maneuver into the mine to hit it; if he had just flown straight or turned left, he would have been safe. Yet another product of the Imperial Fighter Pilot Academy... "Blow up all you want; we'll clone more.")

Coming Soon: Wave 3 Ships (I've got my pre-order in)

Yes, I'm expecting a B-wing, a TIE Bomber, a Lambda Shuttle, and the Moldy Crow (it's from a Star Wars video game)— probably next week. You can bet I'll be testing them out and posting here.

Till then, cue the Imperial Death March and celebrate the victory over the Rebel scum!